This week we learned about the different types of cutting machines and how to use them. We used the laser cutter and the vinyl cutter to make a construction kit and a meme T-shirt.
Requirements
- Do your lab's safety training
- Characterize your lasercutter's focus, power, speed, rate, kerf, joint clearance and types.
- Document your work to the group work page and reflect on your individual page what you learned.
- Design, lasercut, and document a parametric construction kit, accounting for the lasercutter kerf, which can be assembled in multiple ways.
- Cut something on the vinyl cutter.
Group Assignment
individual Assignment
Softwares 💻
- Fusion 360
- SignMaster
- LaserWork
Group Assignment
In this week, we make the aquainntance of our Laser Cutter. I have been working as a Fab Lab Specialist for about 2 years so I have a lot of experience with operating it but it was good to rego over the basics again and discover features or materials I never used before.
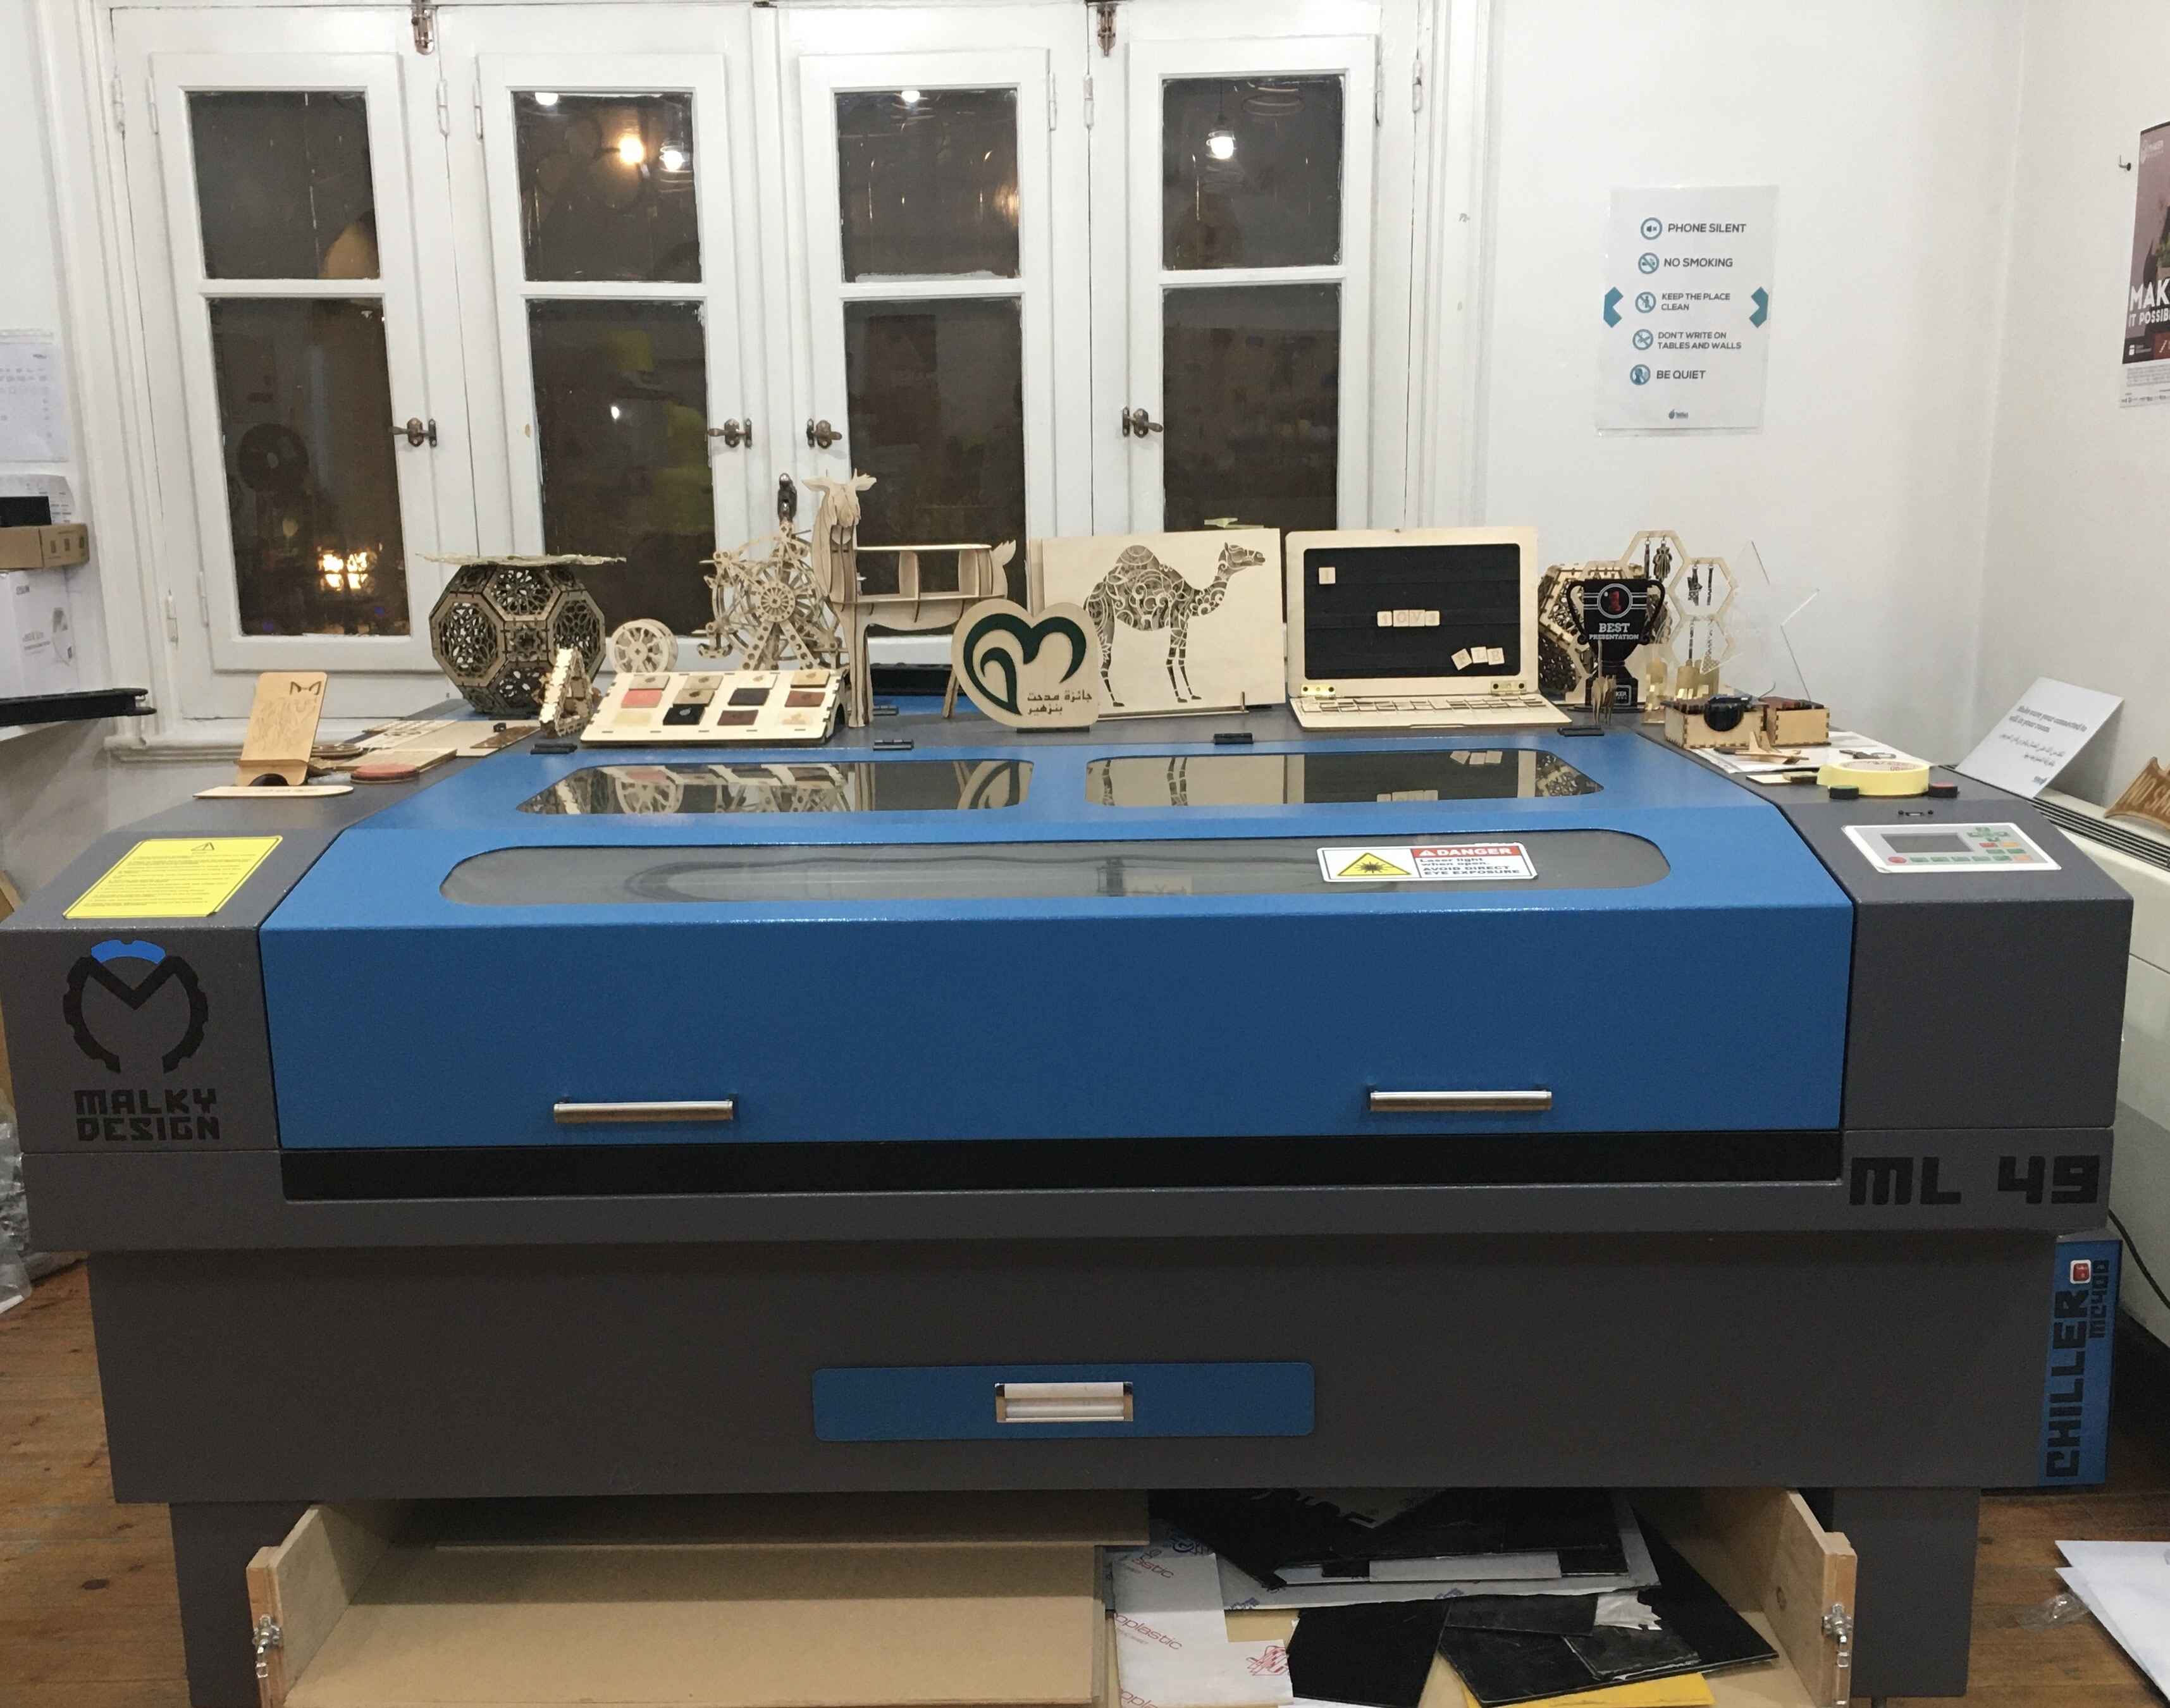
This is The Malky149 Laser Cutter. it's a CO2 Egyptian-made laser cutter.
Technical Specs
- Tube Power: 90 watt
- Working Area: 140 cm * 90cm
- Software: RDWorks, LaserWork, ThunderLaser
Focus
Focus is the focal length of the lens at which the laser is concentrated. We used a test to try the different parameters: cutting, engraving, dotting, and scoring, like shown in the Group Assignment. Then We begane to change the adjusting of the laser's head and make the smallest possible pulse. The focus was 5.5-ish mm.
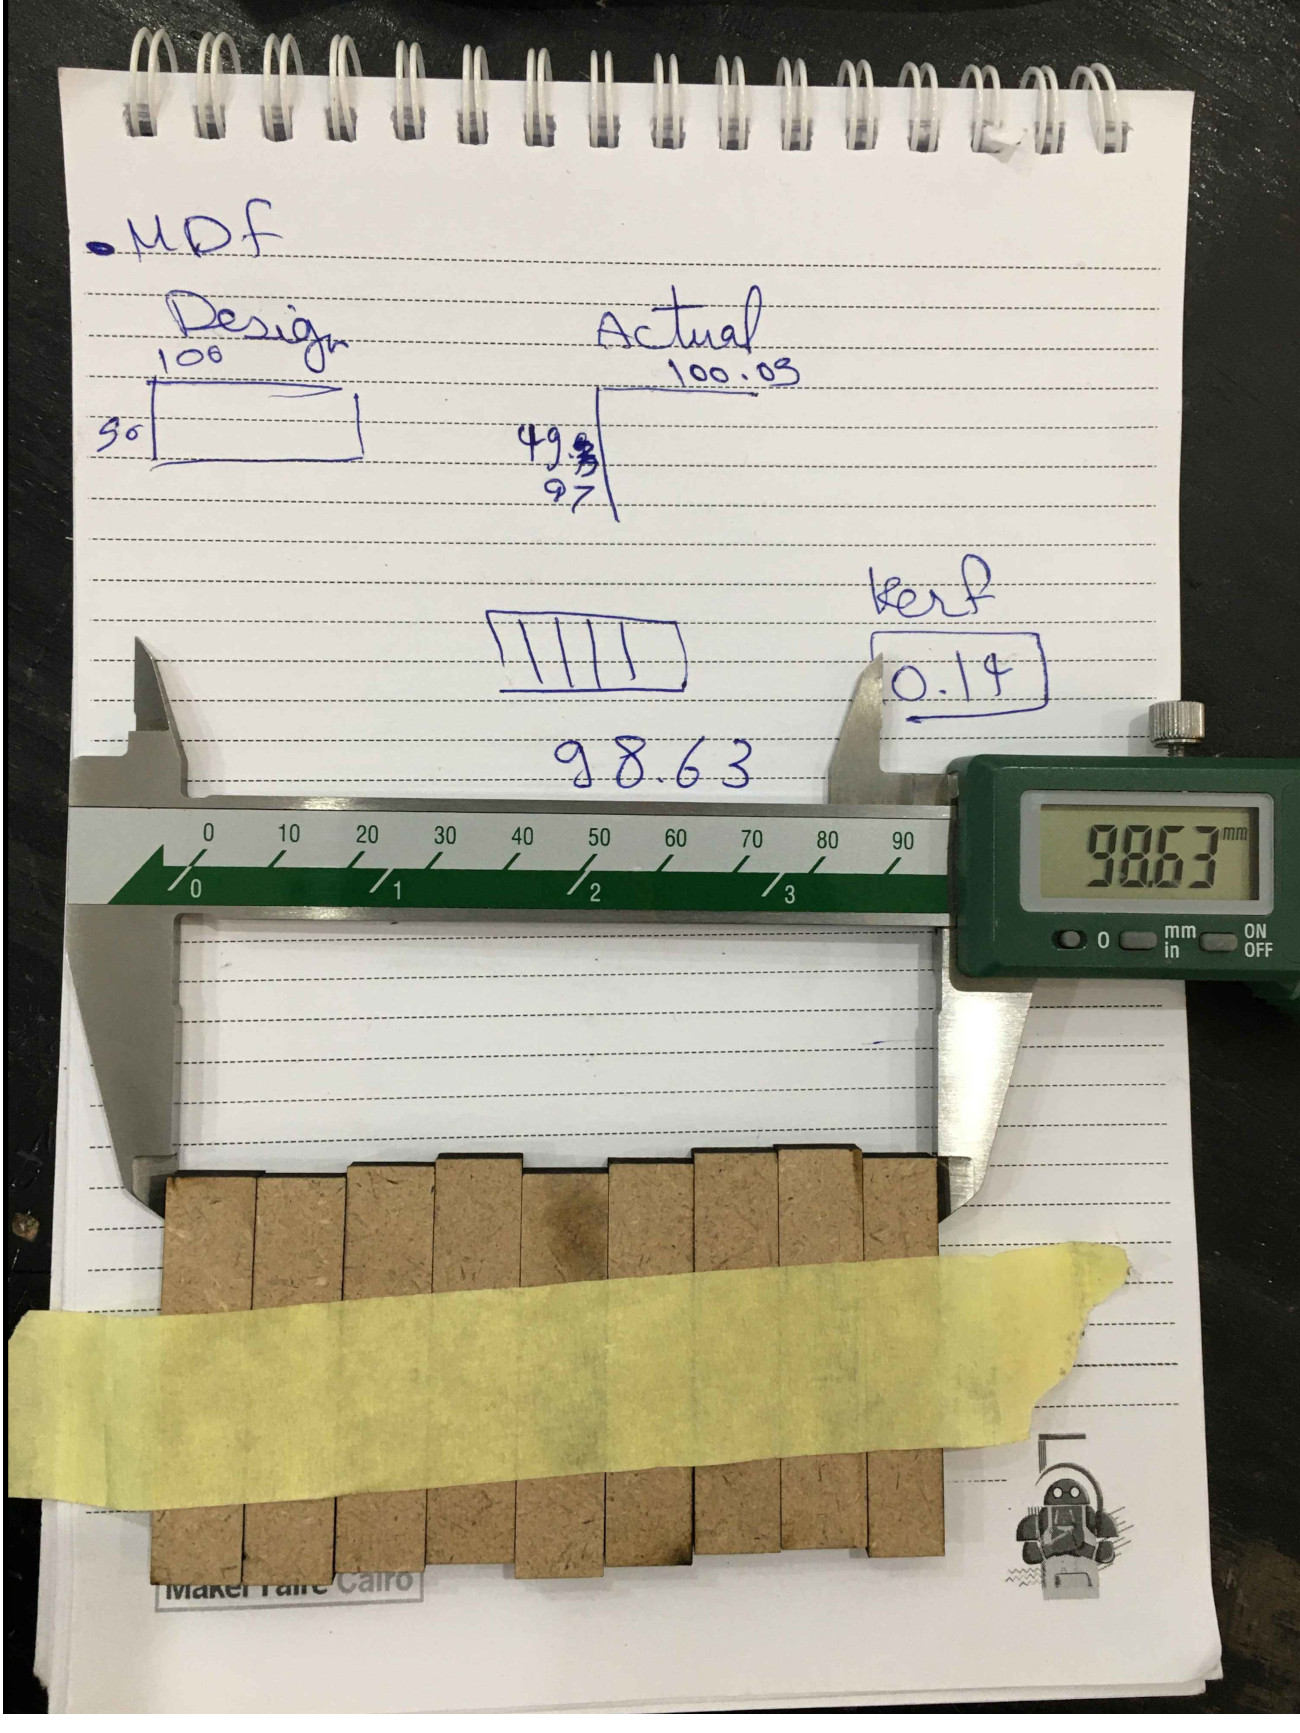
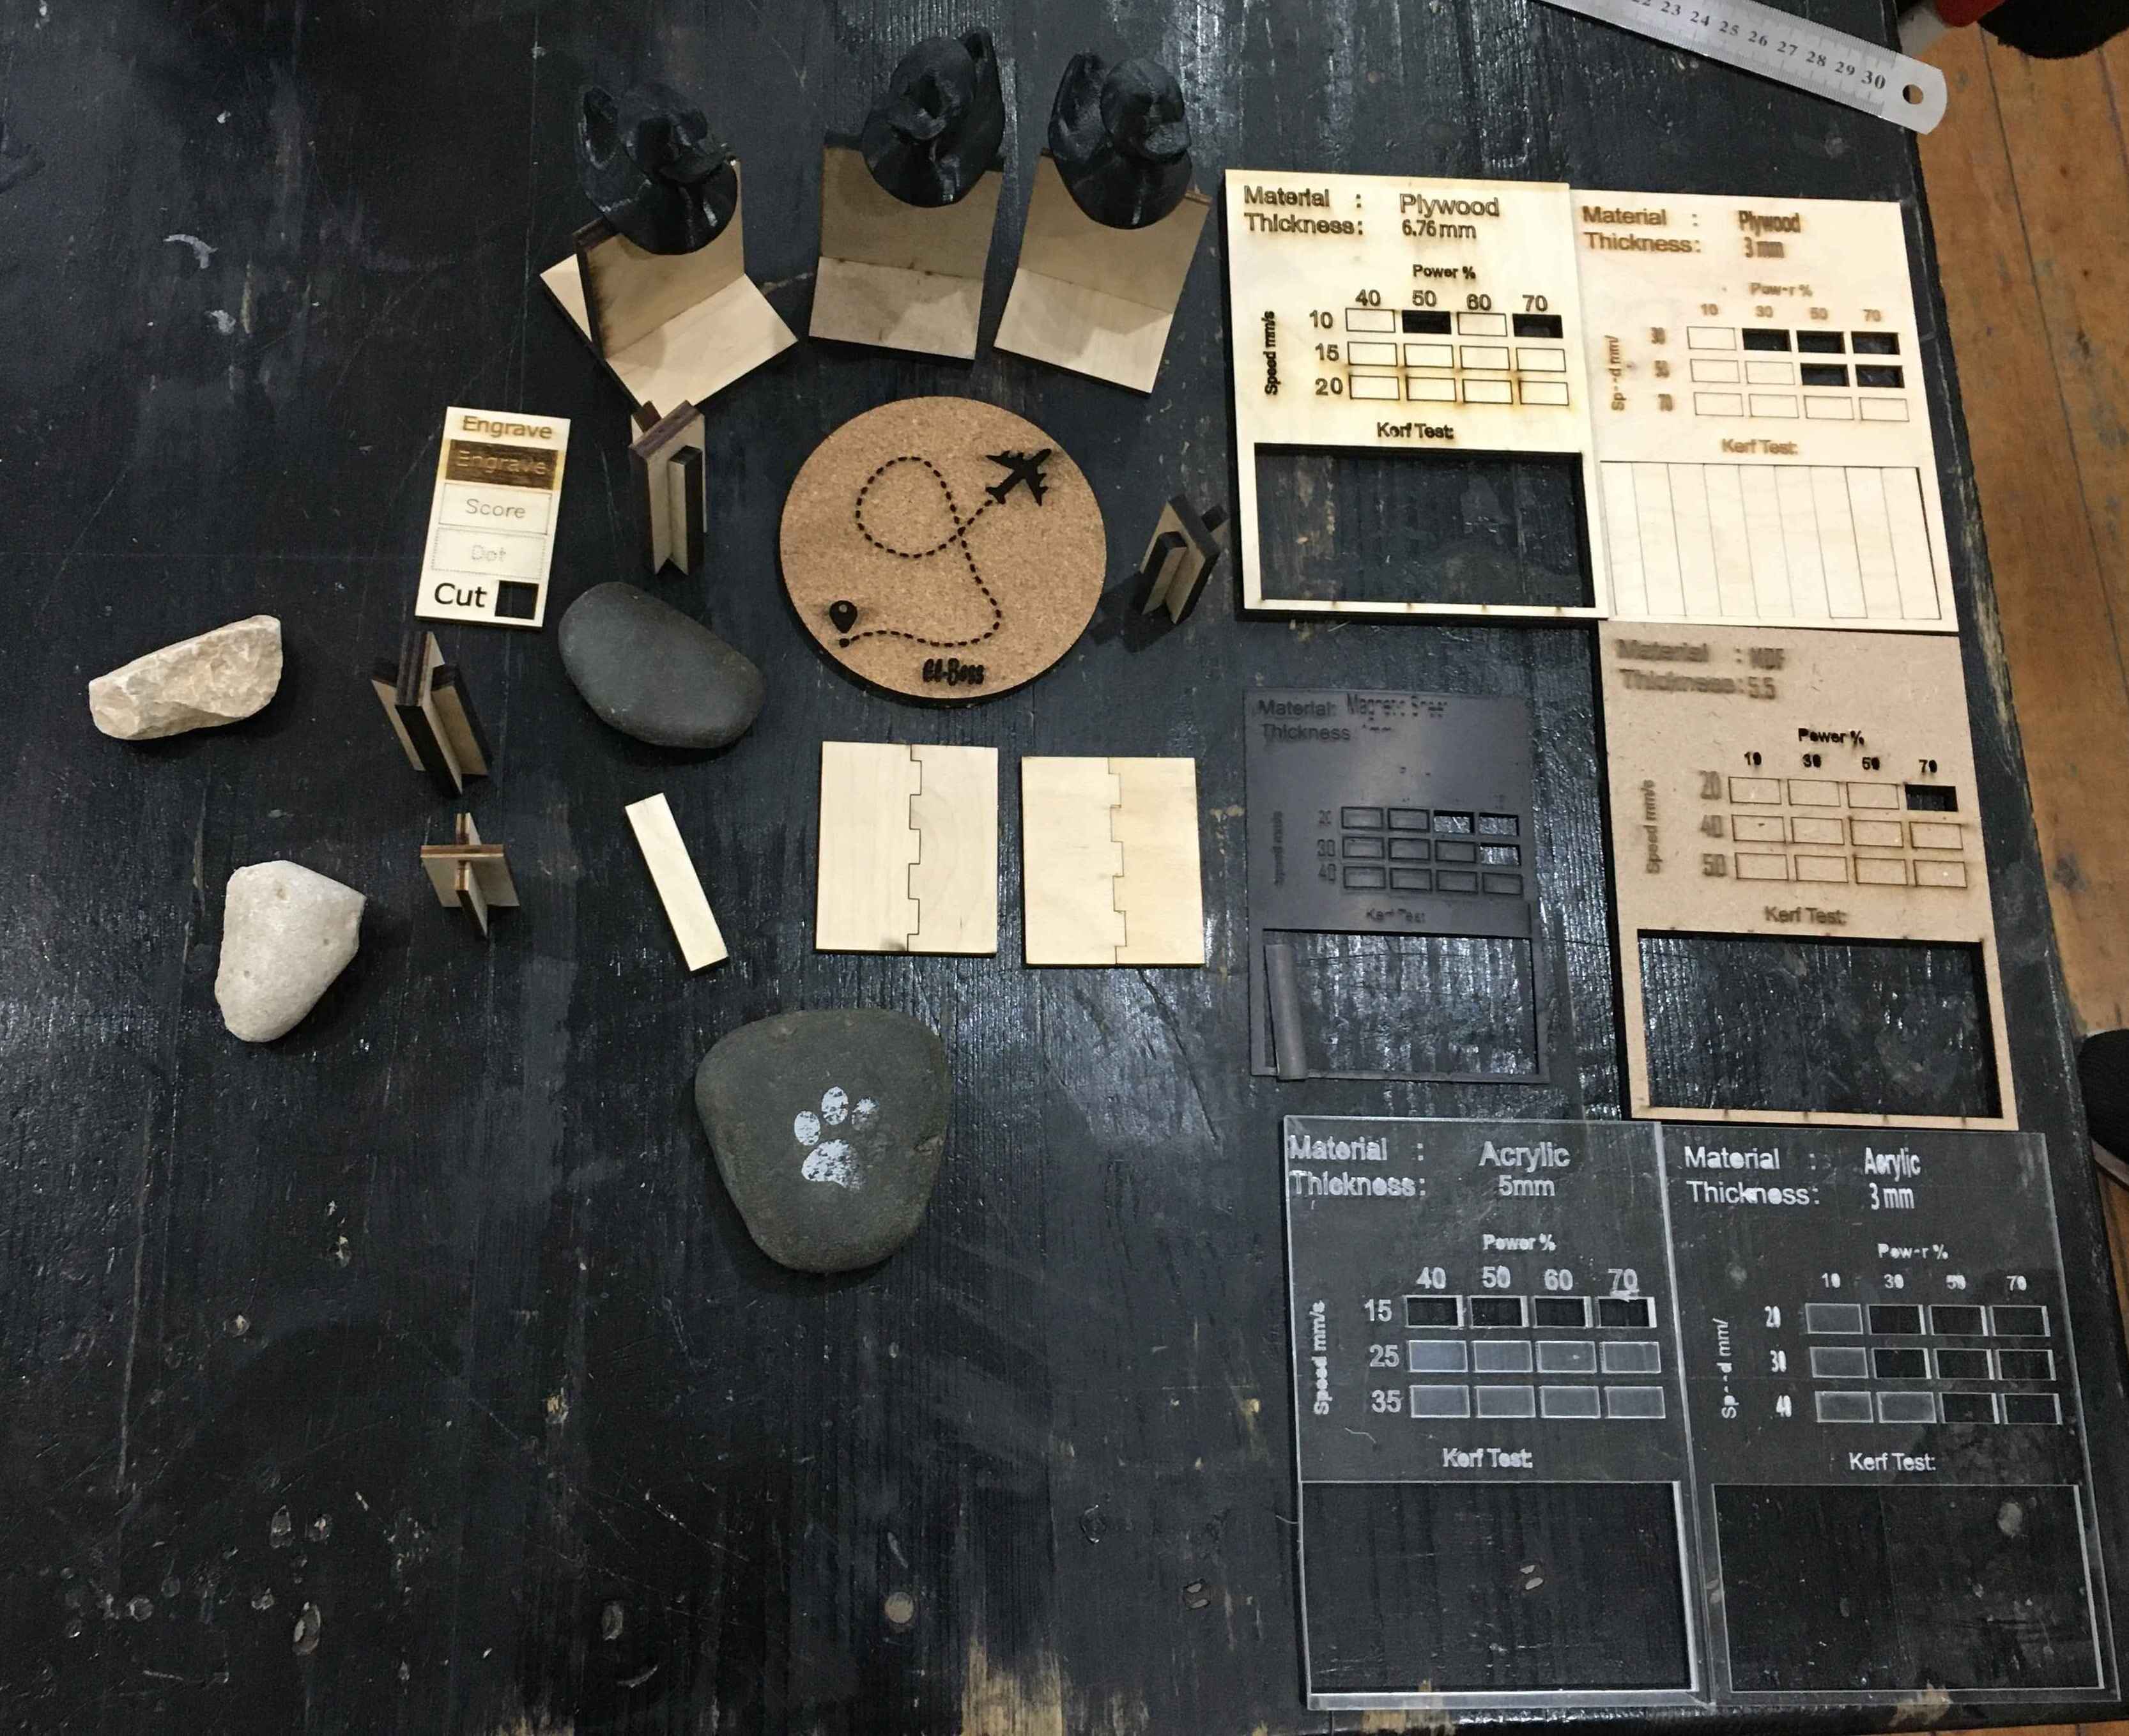
Material Tests & Kerf
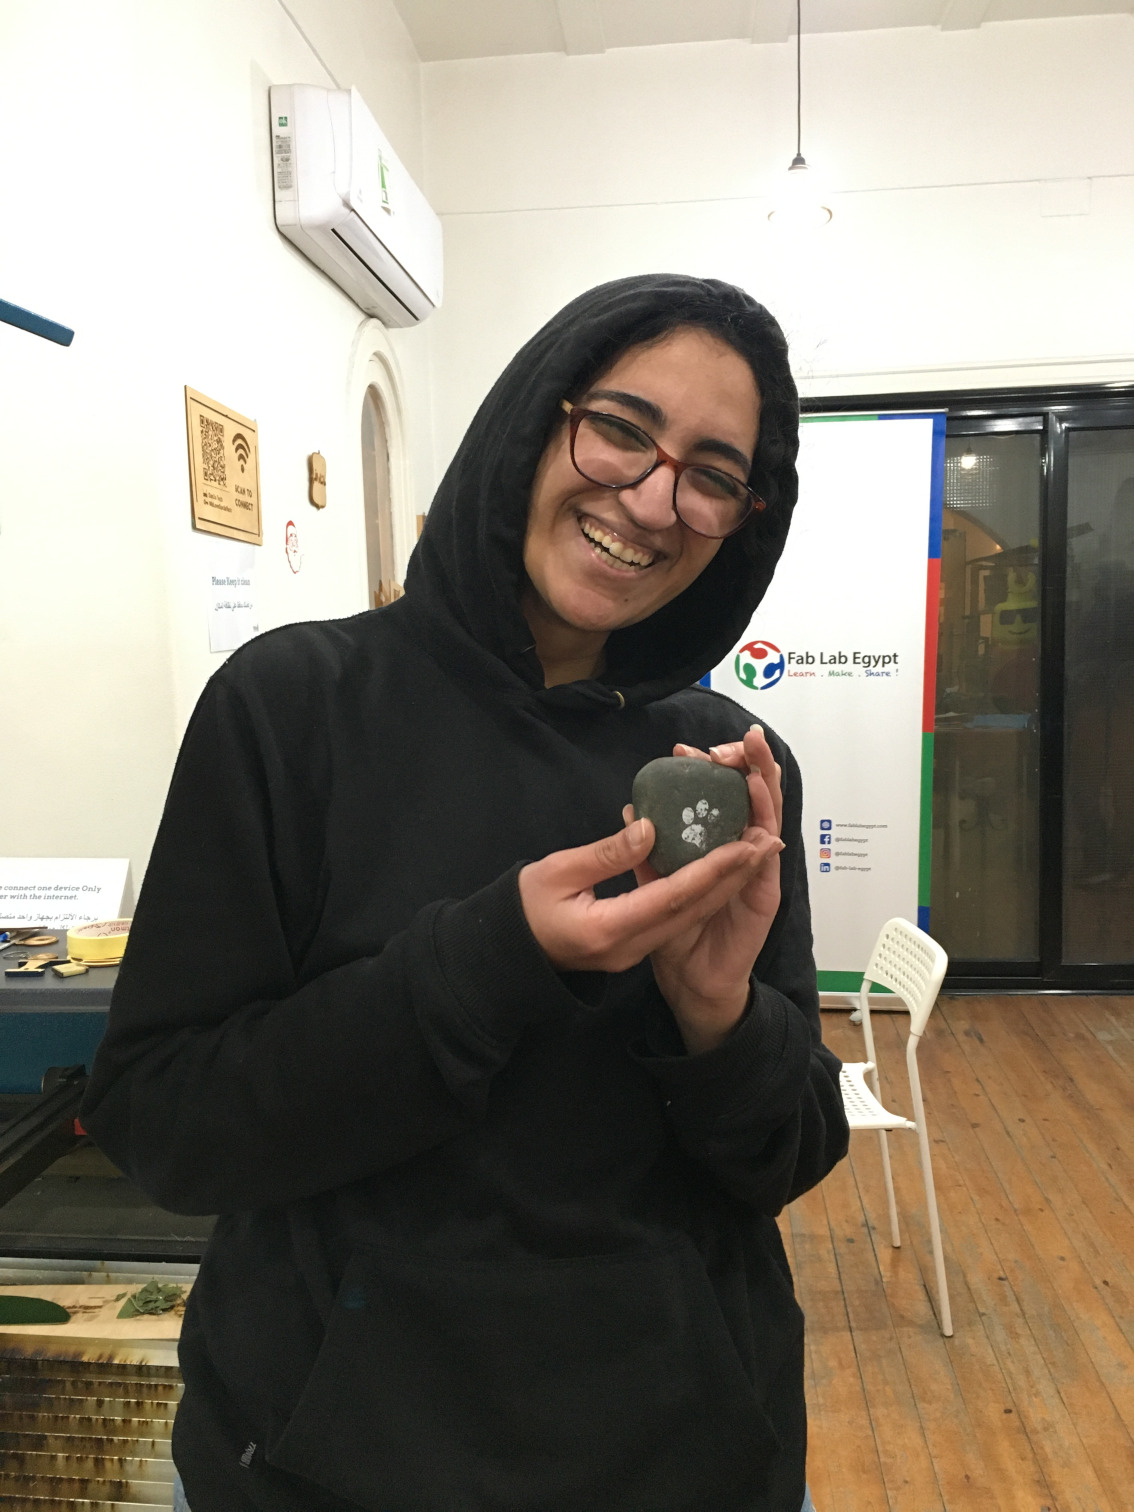
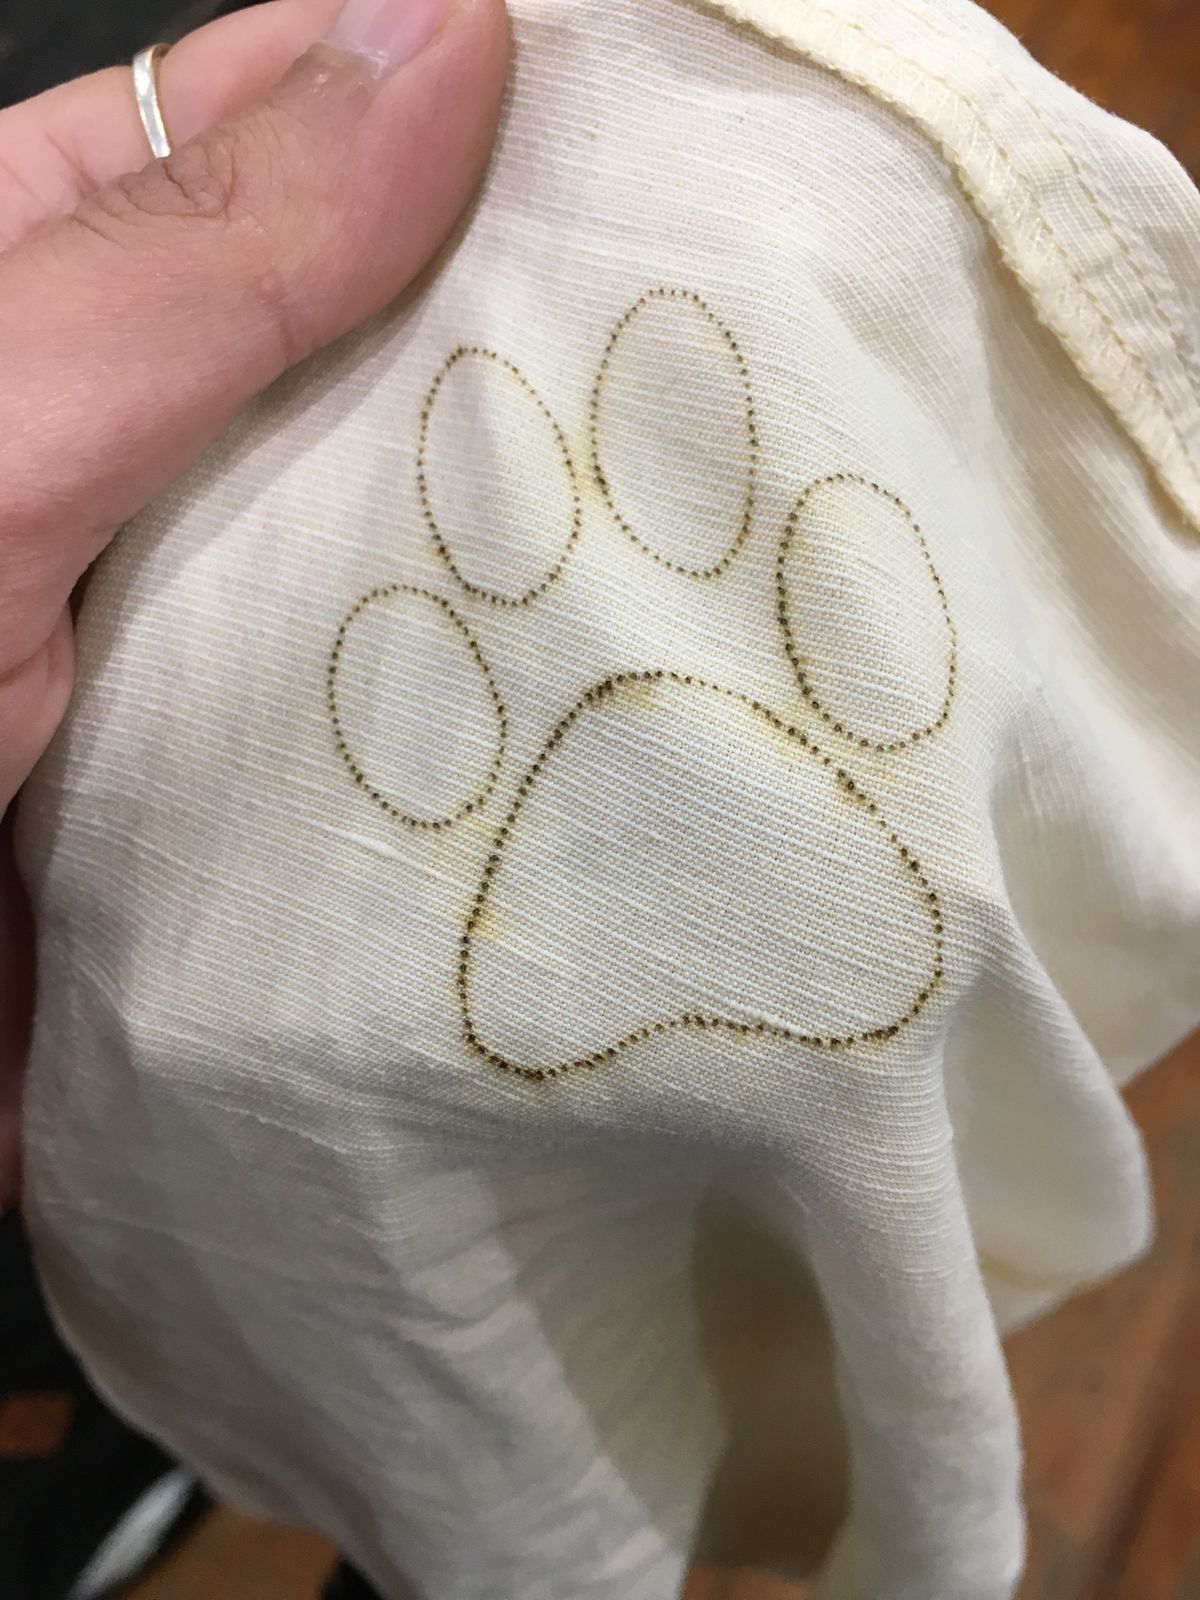
We used a material test file -linked below- to identify Kerf, suitable speed and power for each material. The file contains a series of shapes to test different parameters. I used it to test 5.5mm MDF & Magnetic Sheet of thickness ~2mm. To spice up things I brought an old linen shirt with me & a rock from the garden at the lab and I engraved a cat's paw on a rock and the Linen shirt.
Linen
Speed: 350 power: 15%
Cat's paw on rocks
Speed: 300 power: 25%
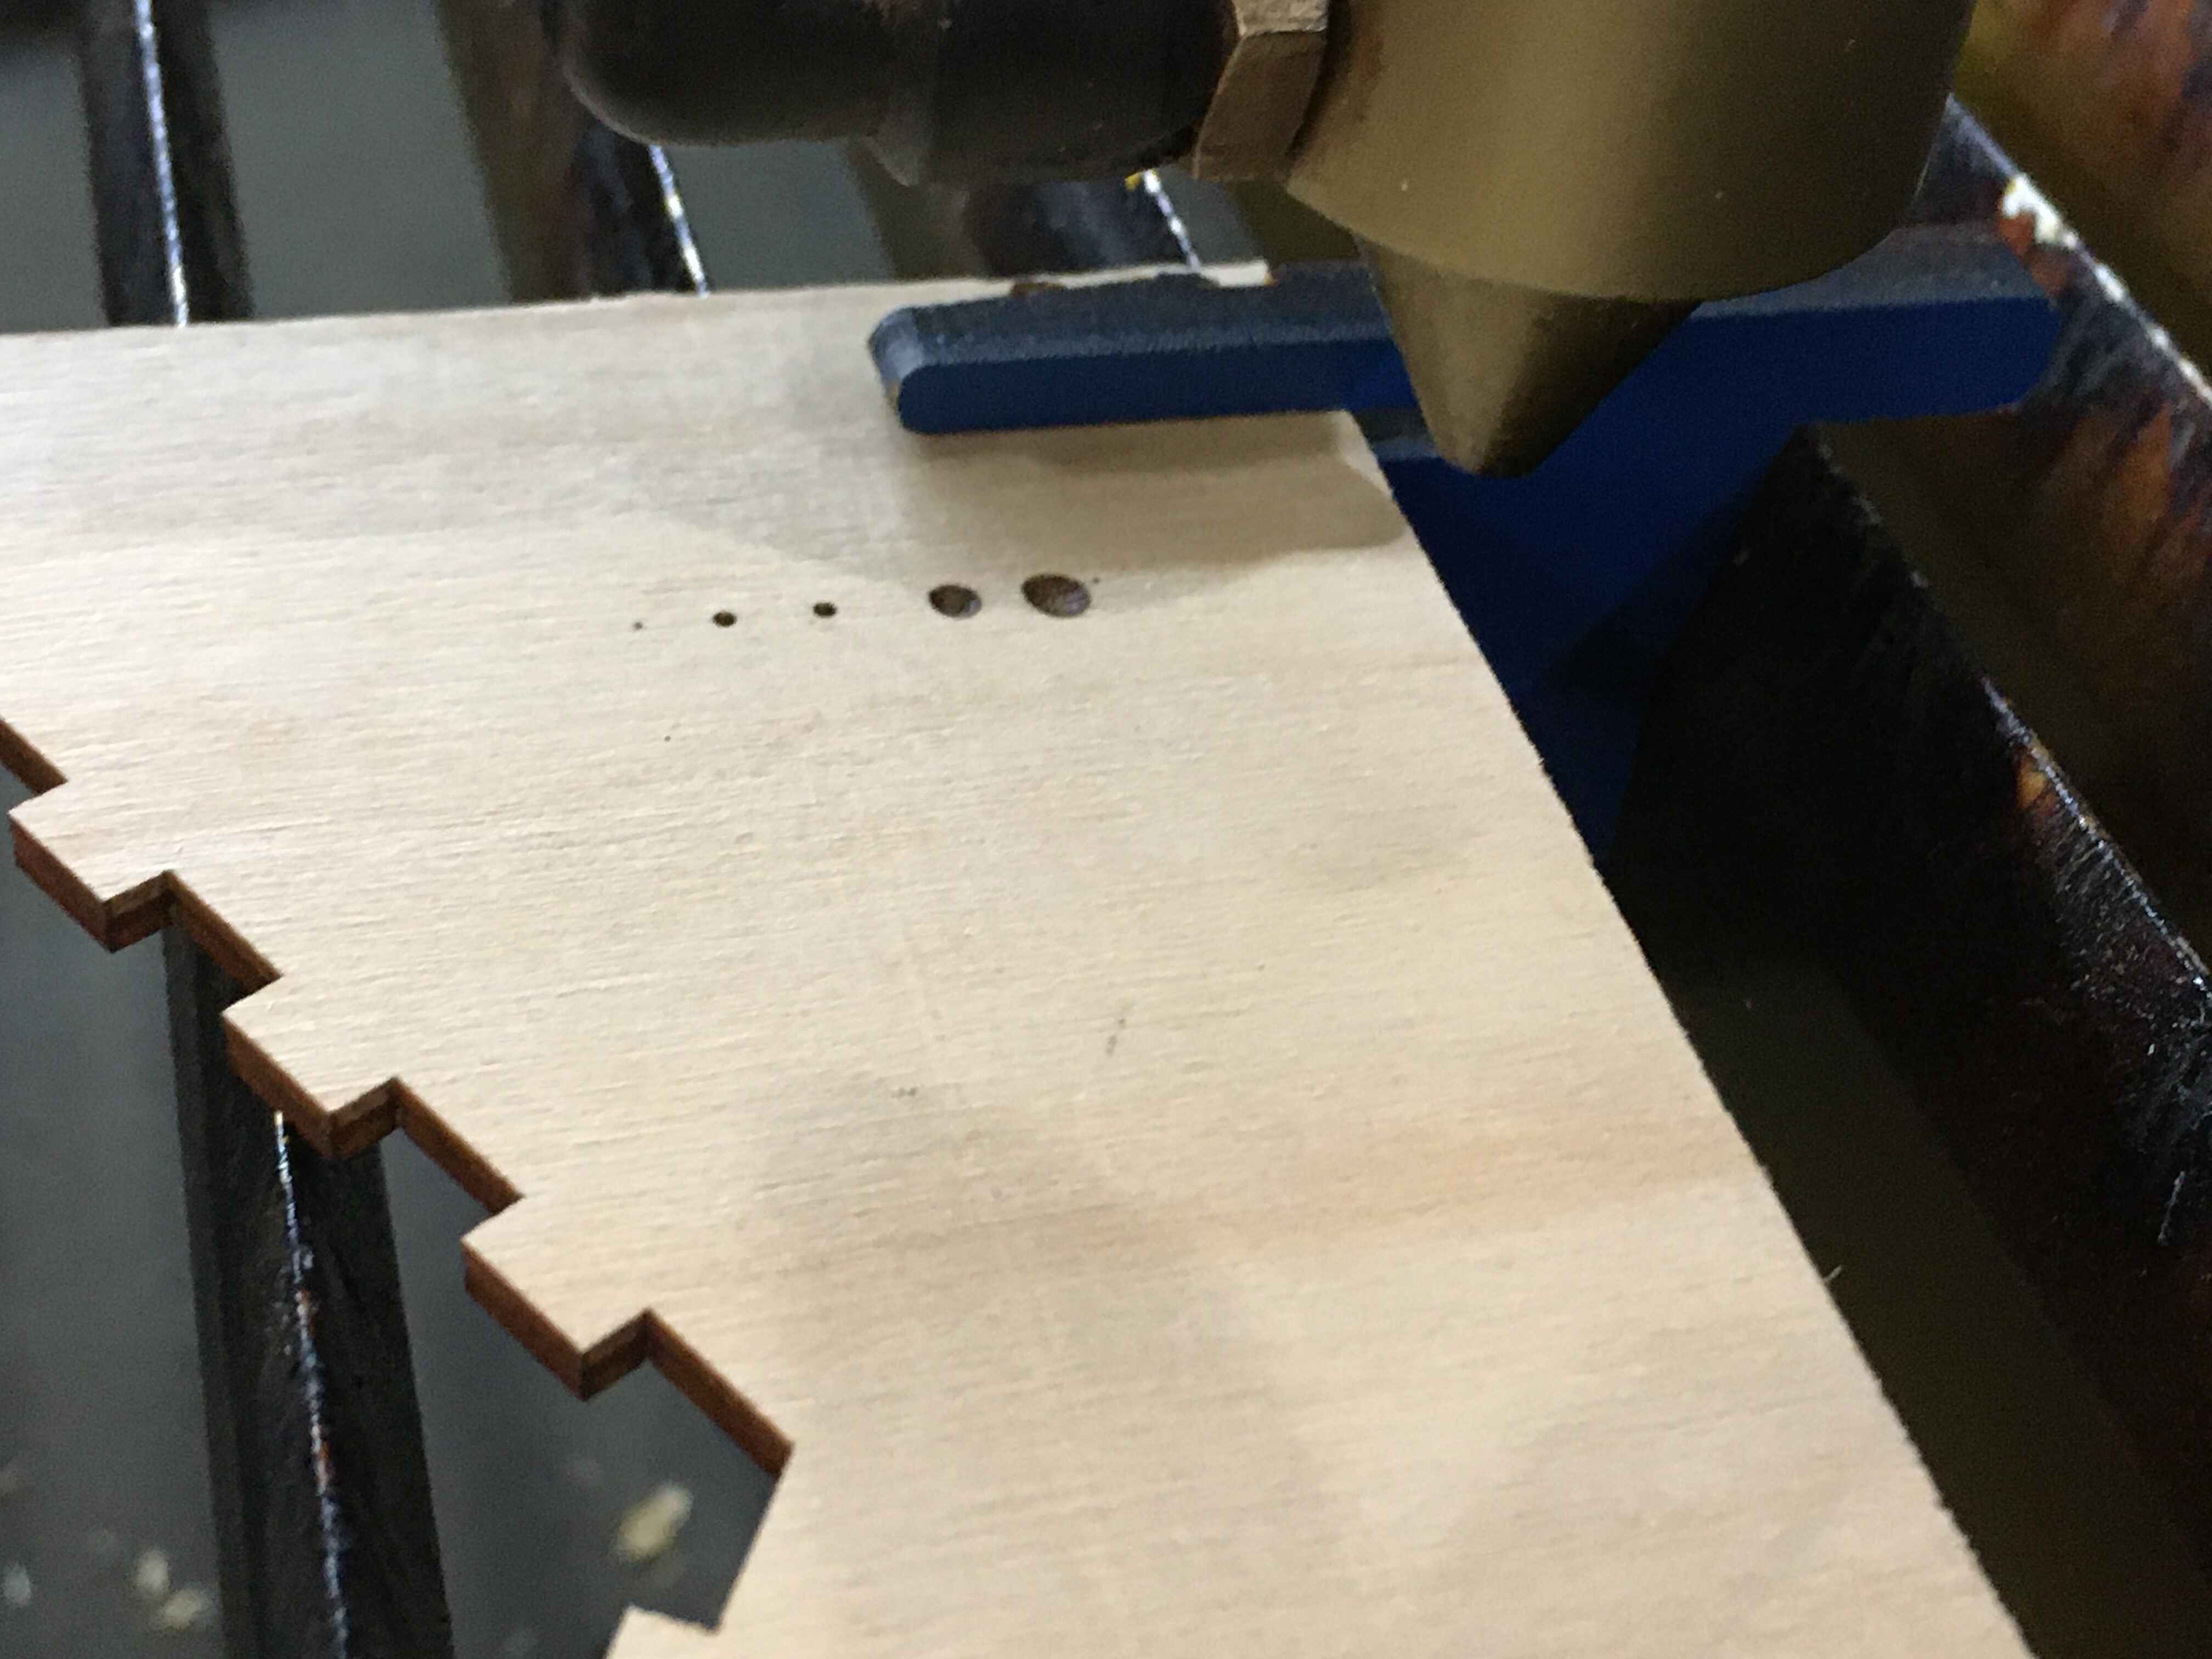
Kerf's the amount of lost material because of the laser cutting process, it'susually half the laser beam diameter. And Each material has different kerf. We used the mention material above to calculate it. Check out Doaa's documentation to learn more. I calculate the kerf for the 5.5mm MDF.The Kerf was 0.142.
Then we applied the calculations we made on making a press-fit joints based on the kerf measuments. I chose to create an X-slot for the 3mm plywood which Doaa made the calculations for.
.jpg)
Kerf = 0.11
Playing with different materials

Magnetic Sheet
Rocks
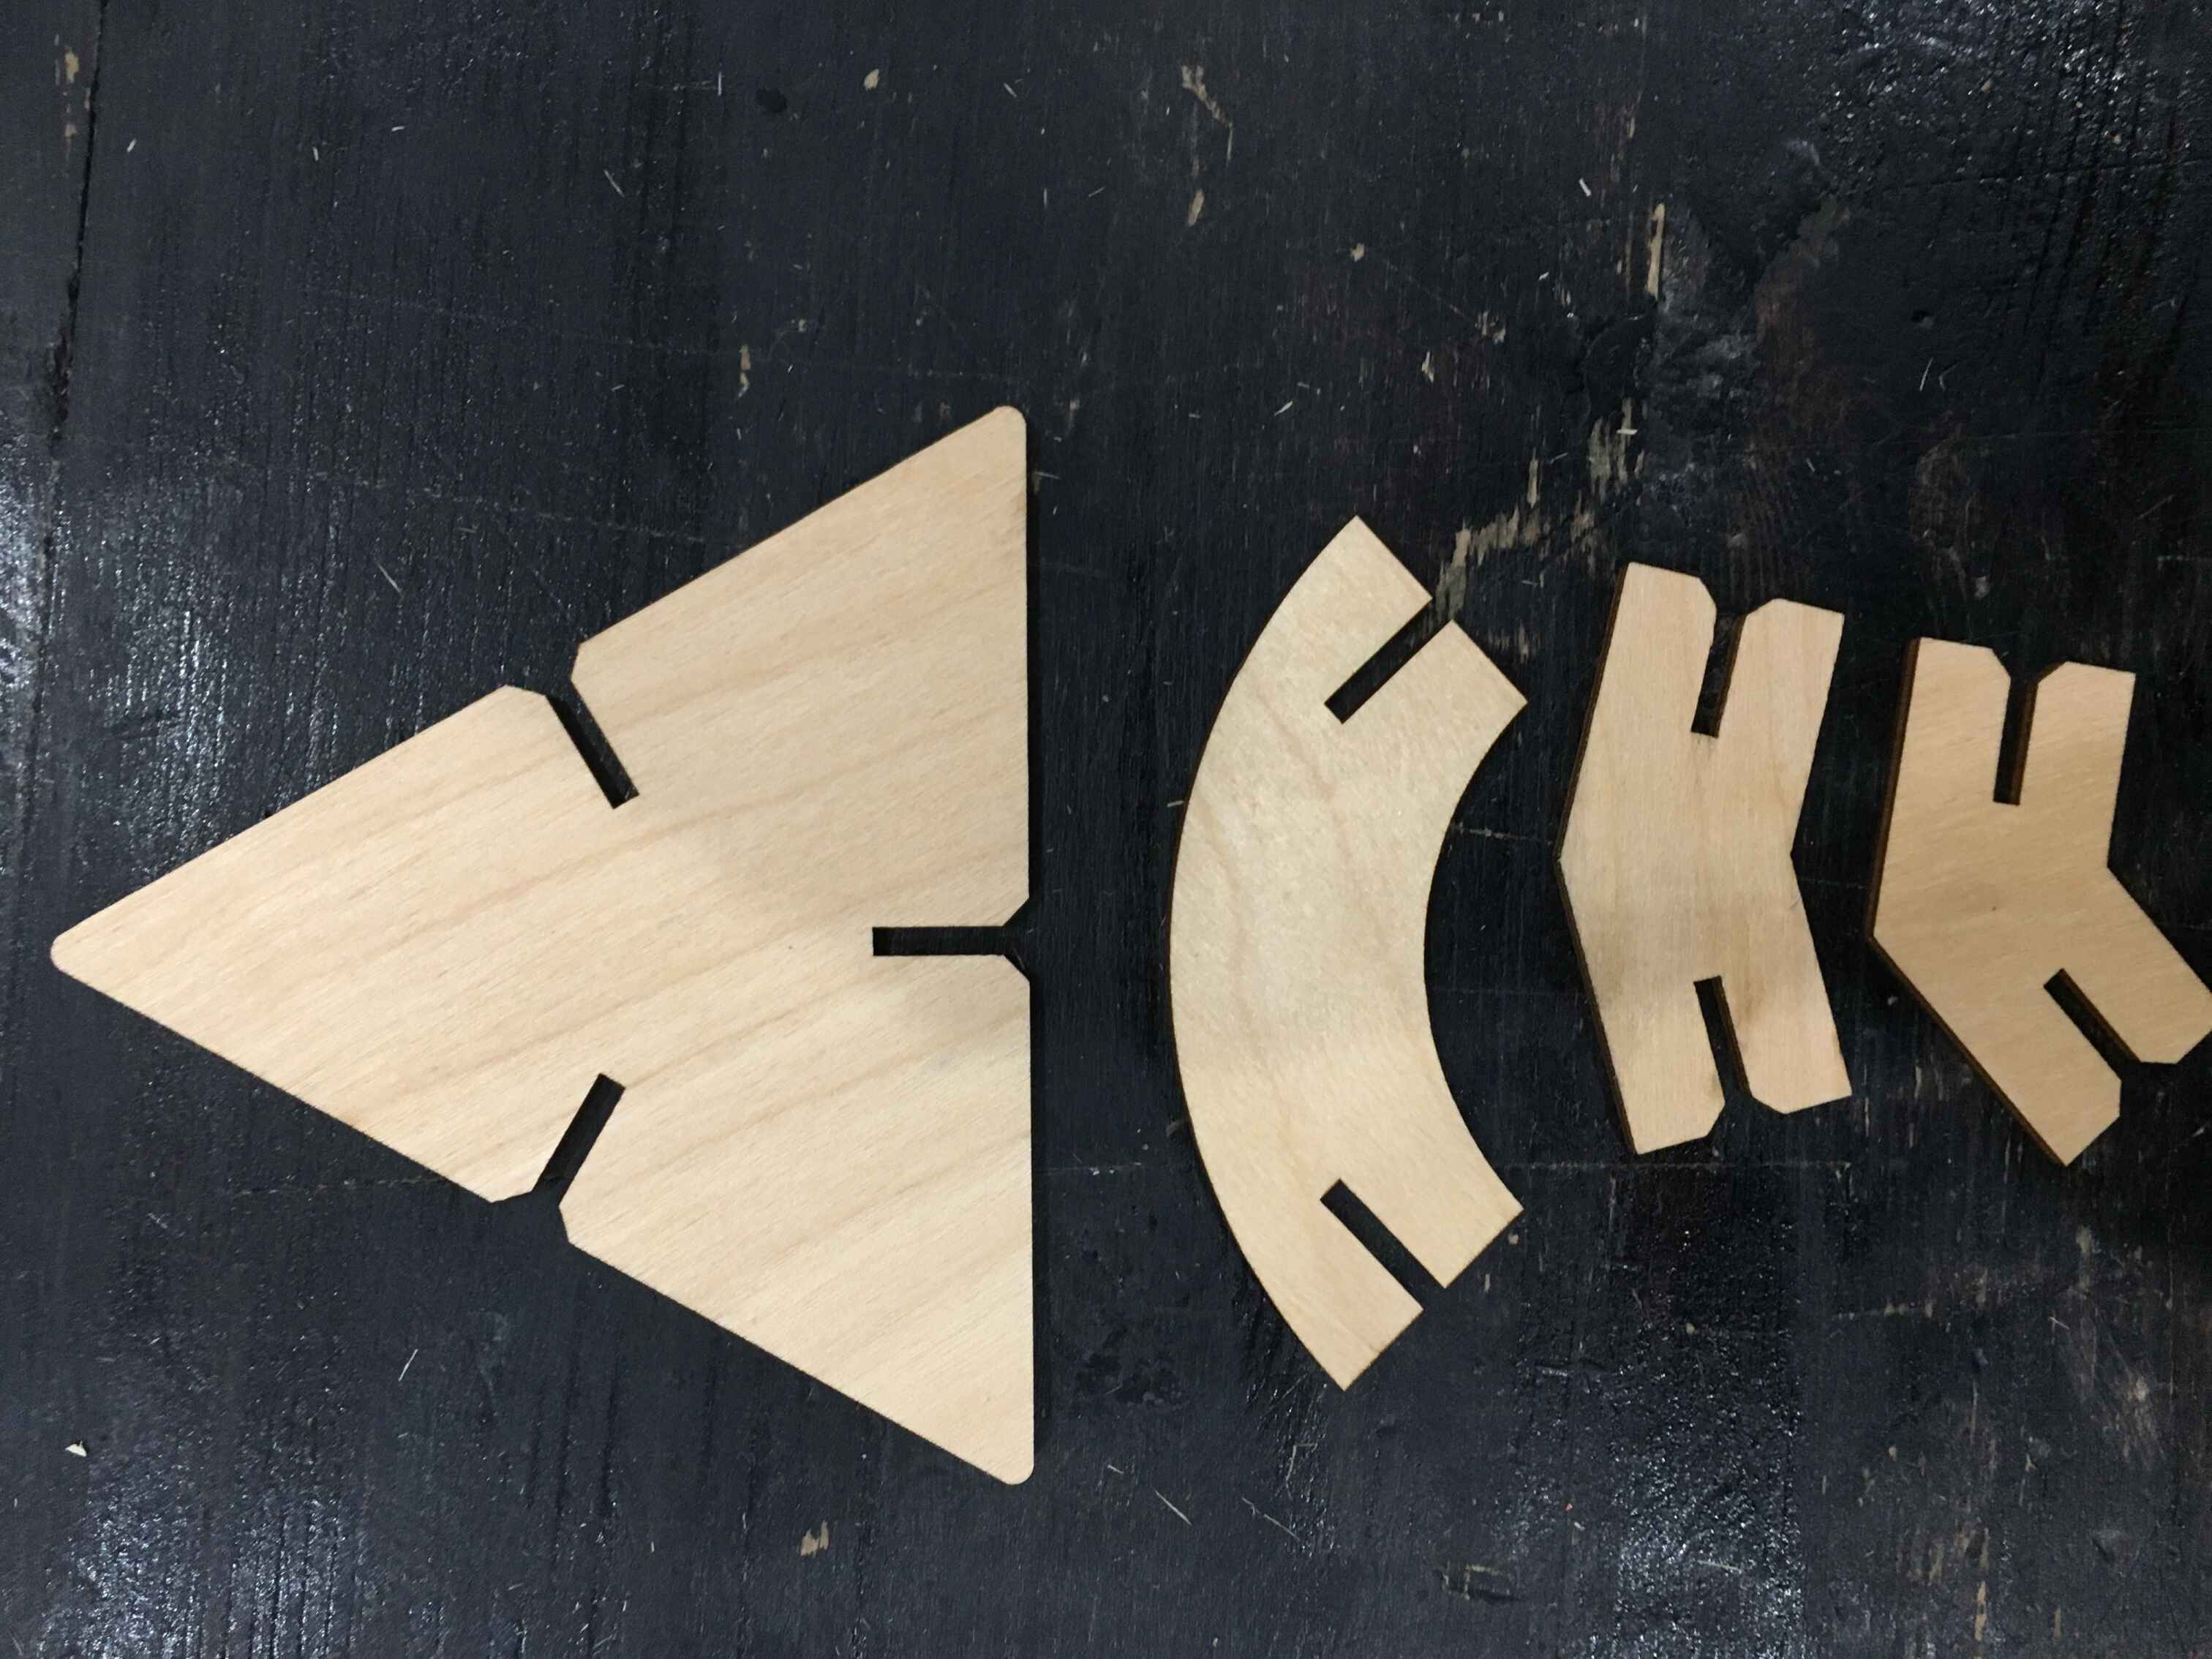
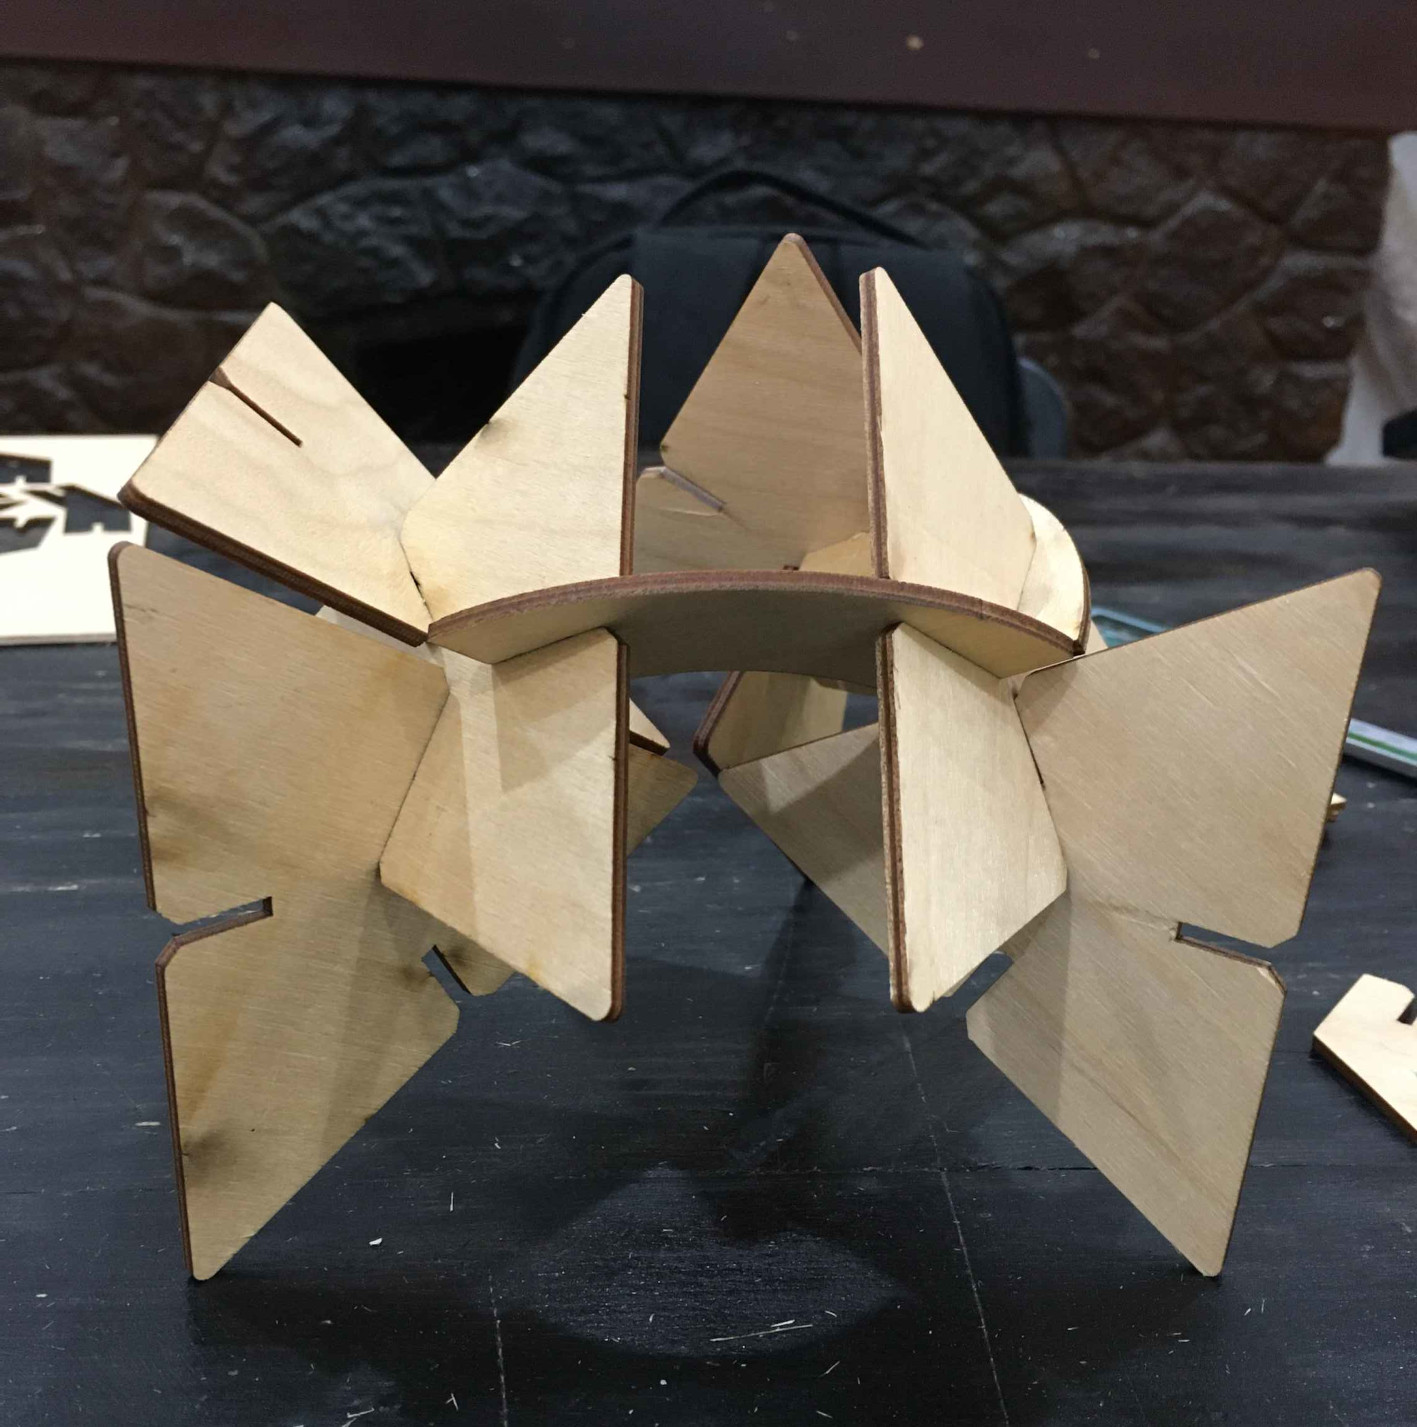
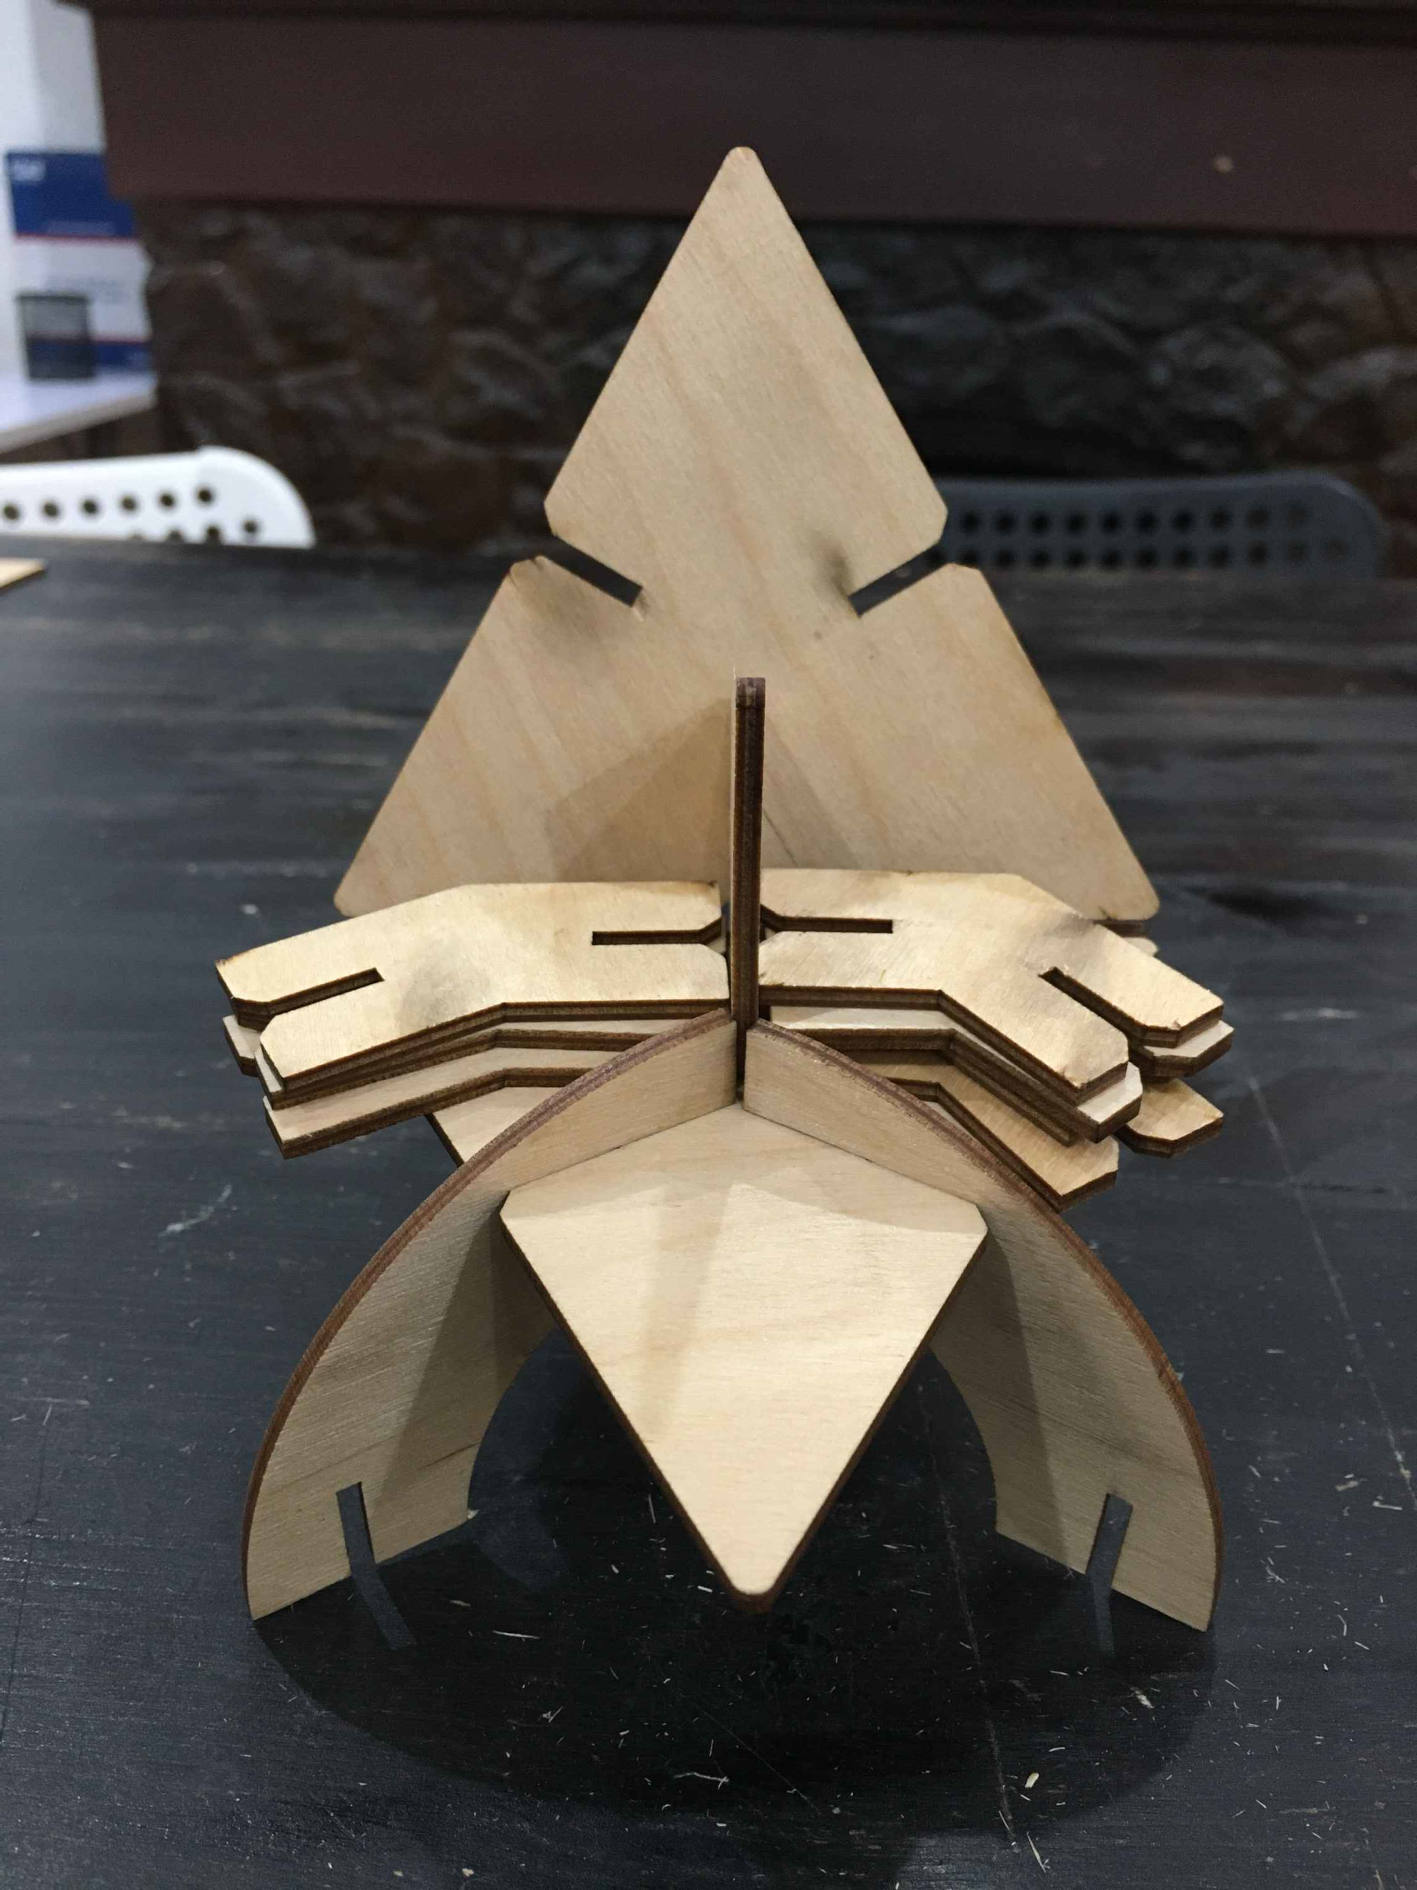
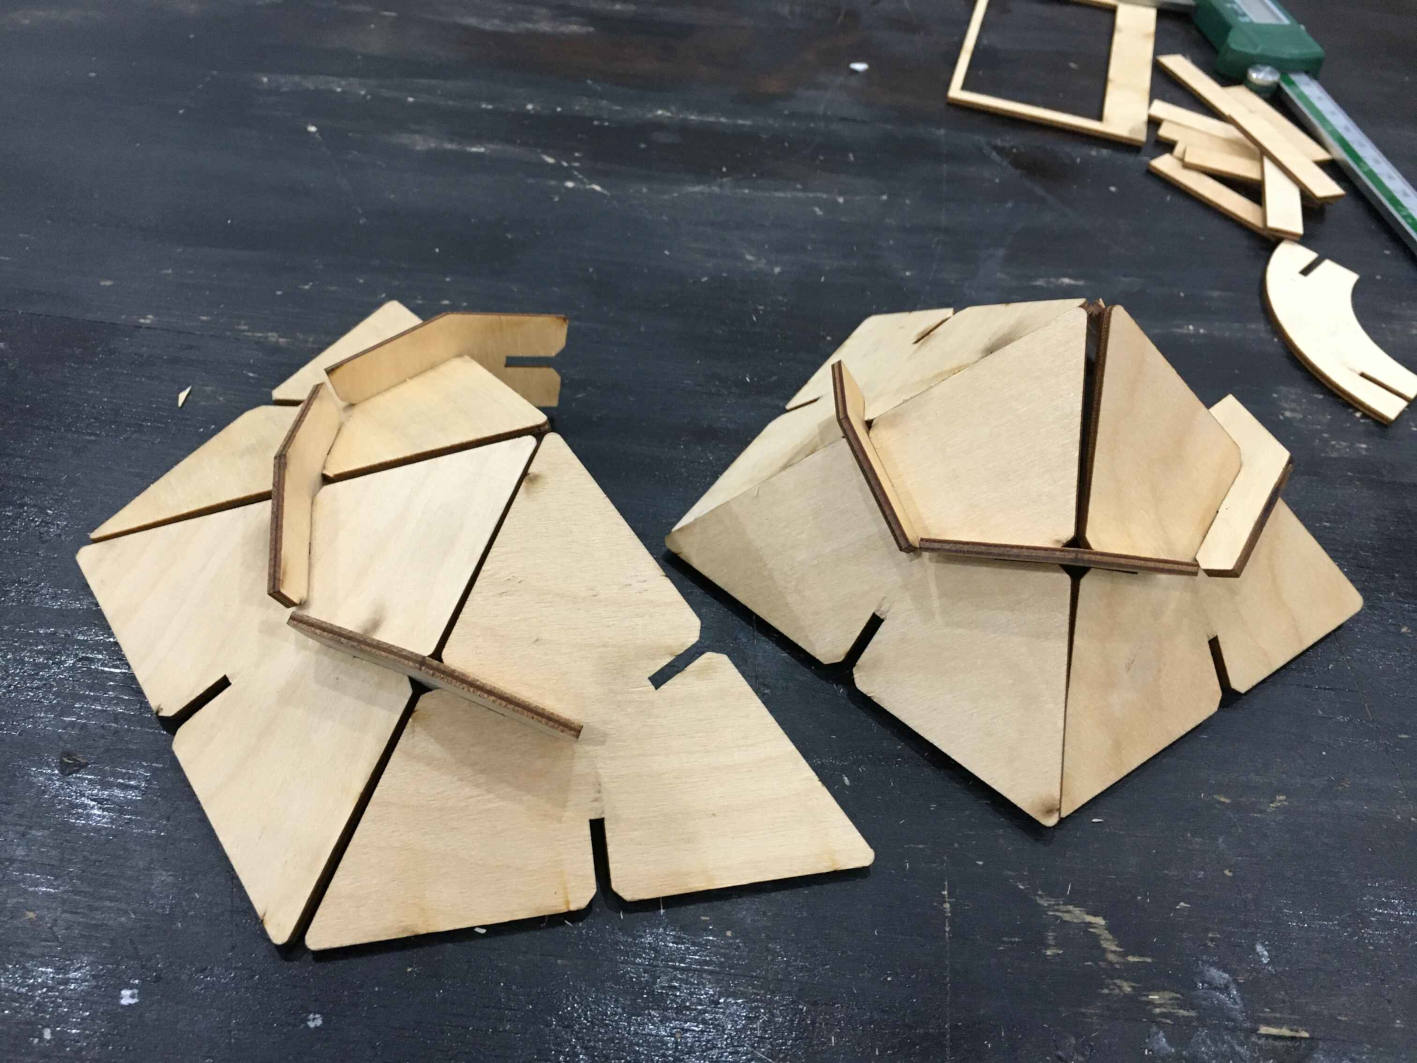
Construction kit
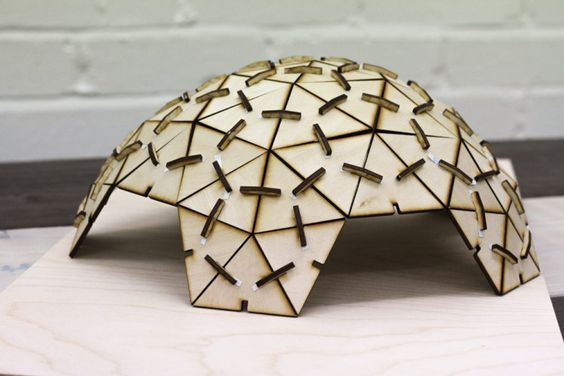
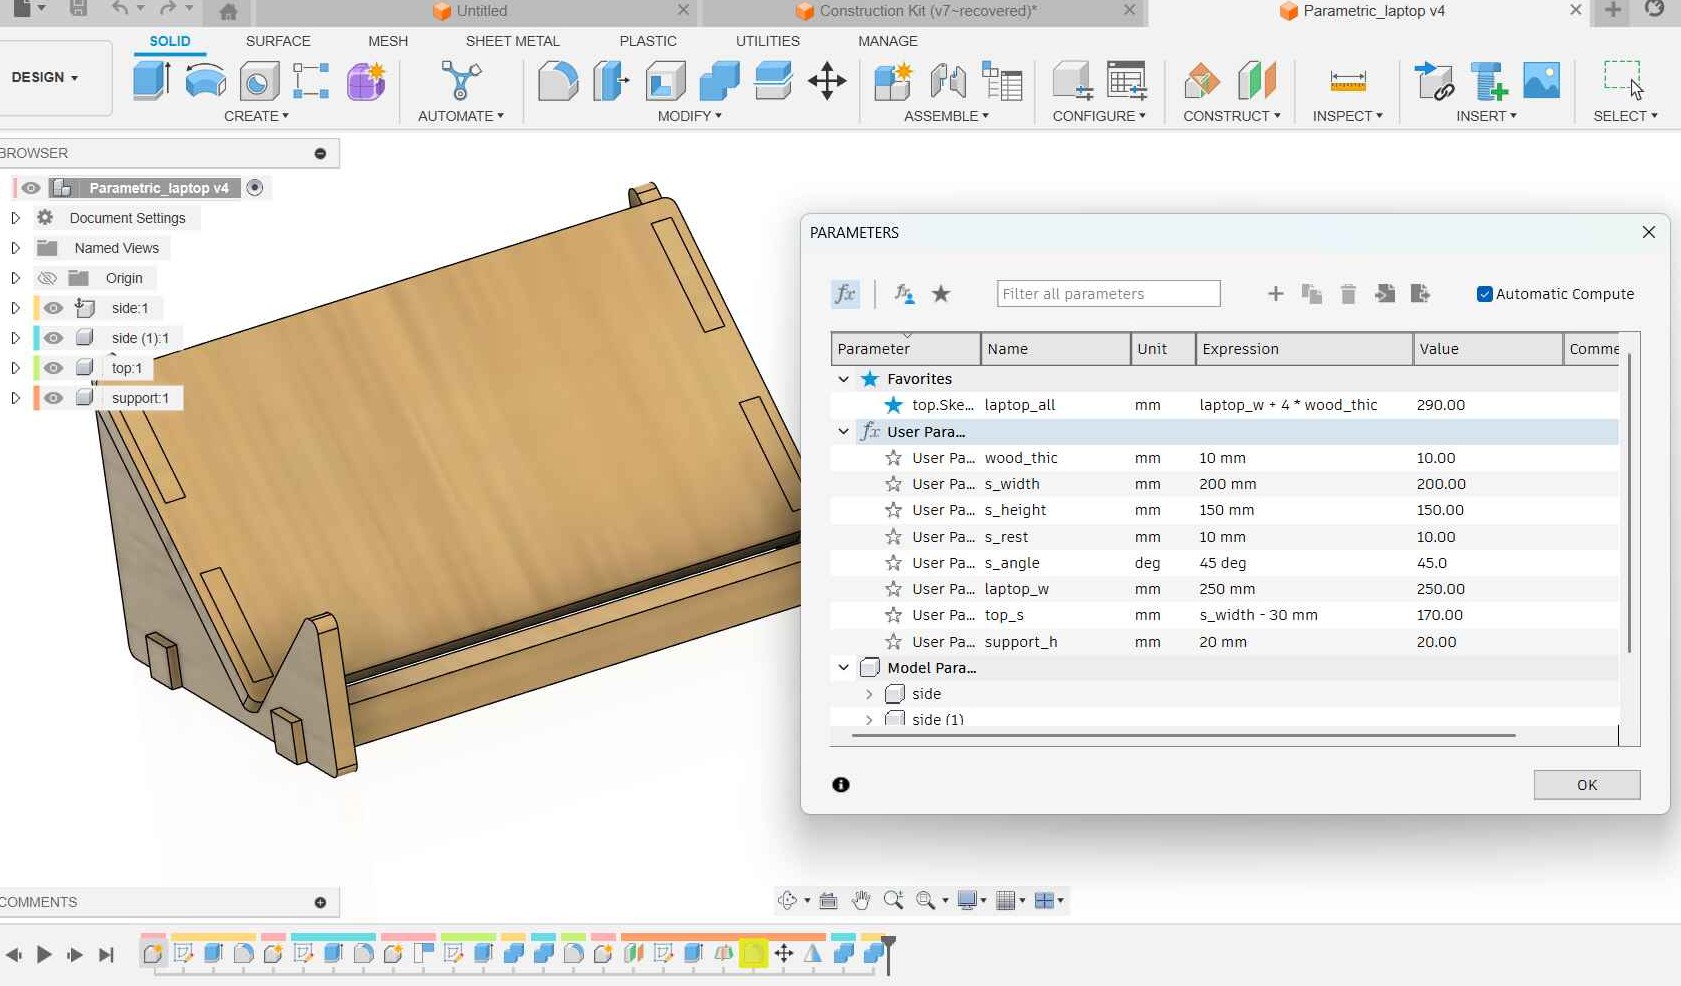
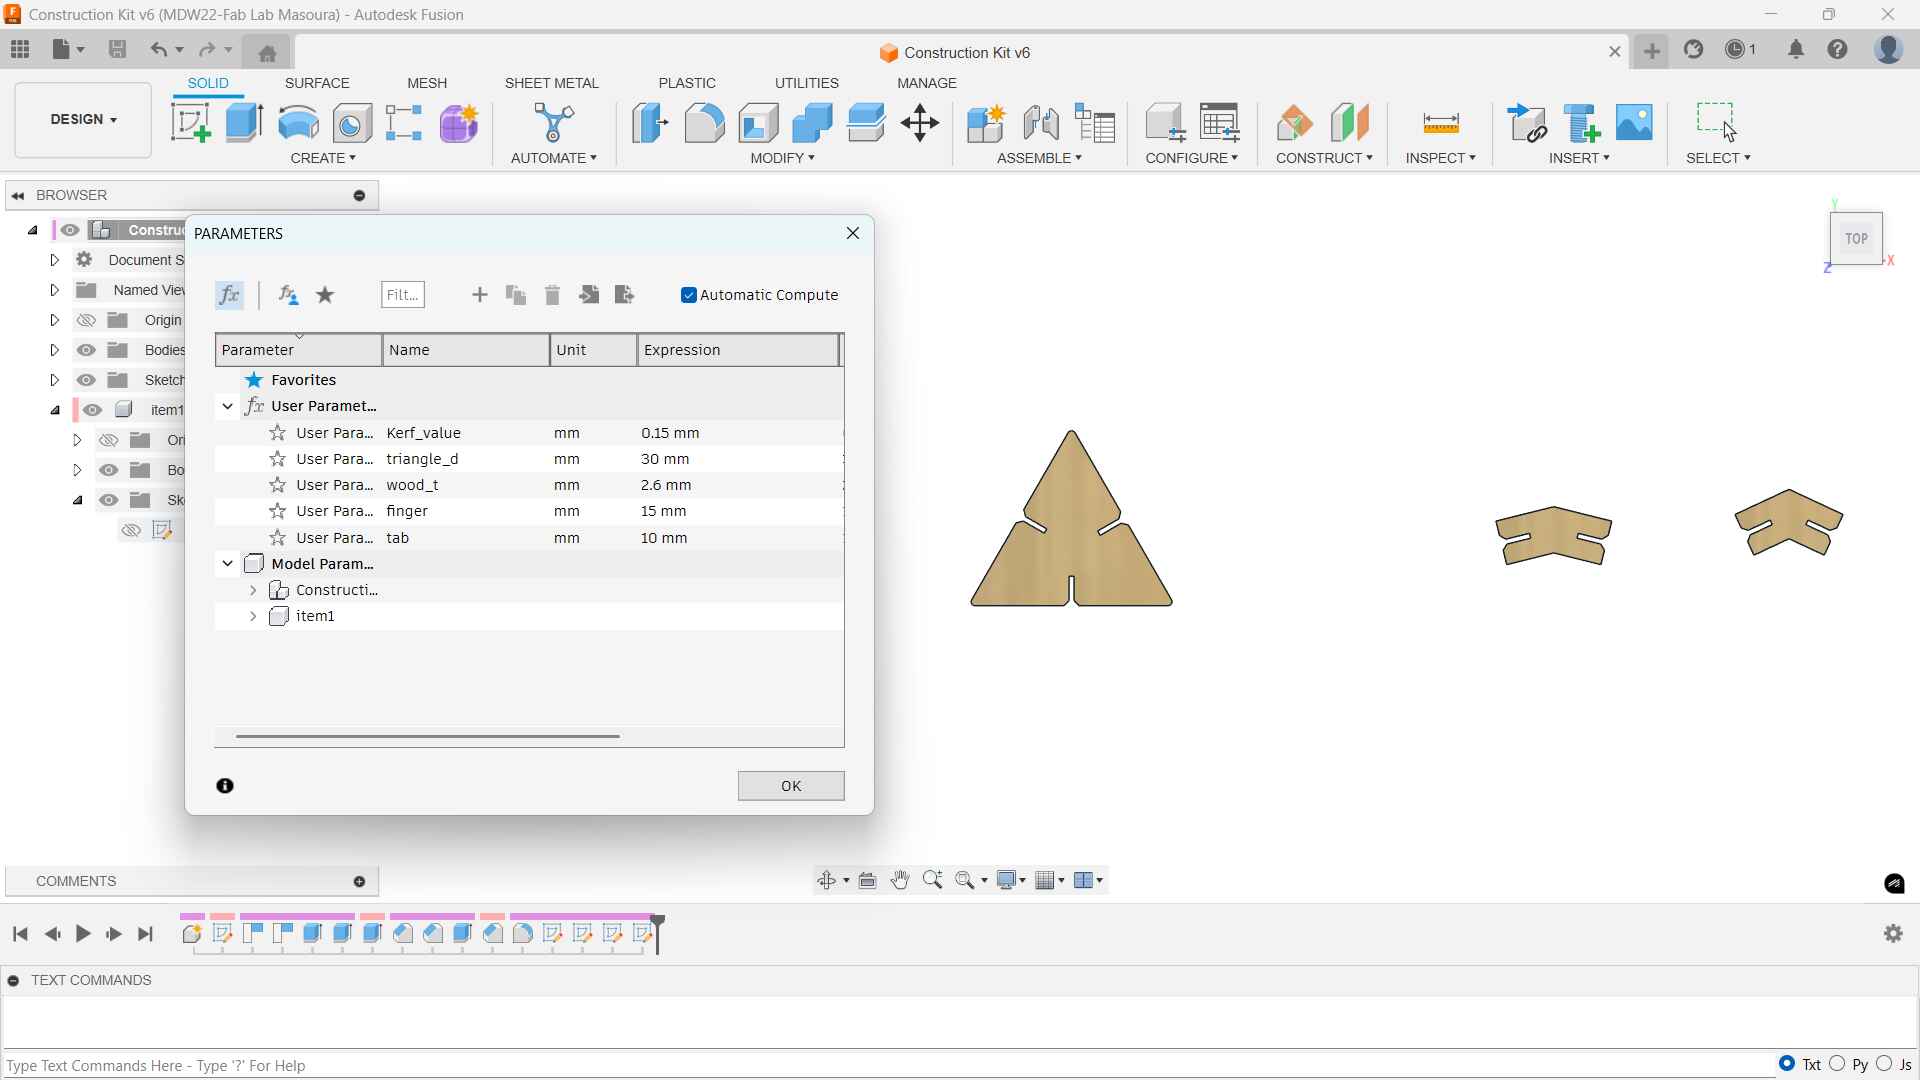
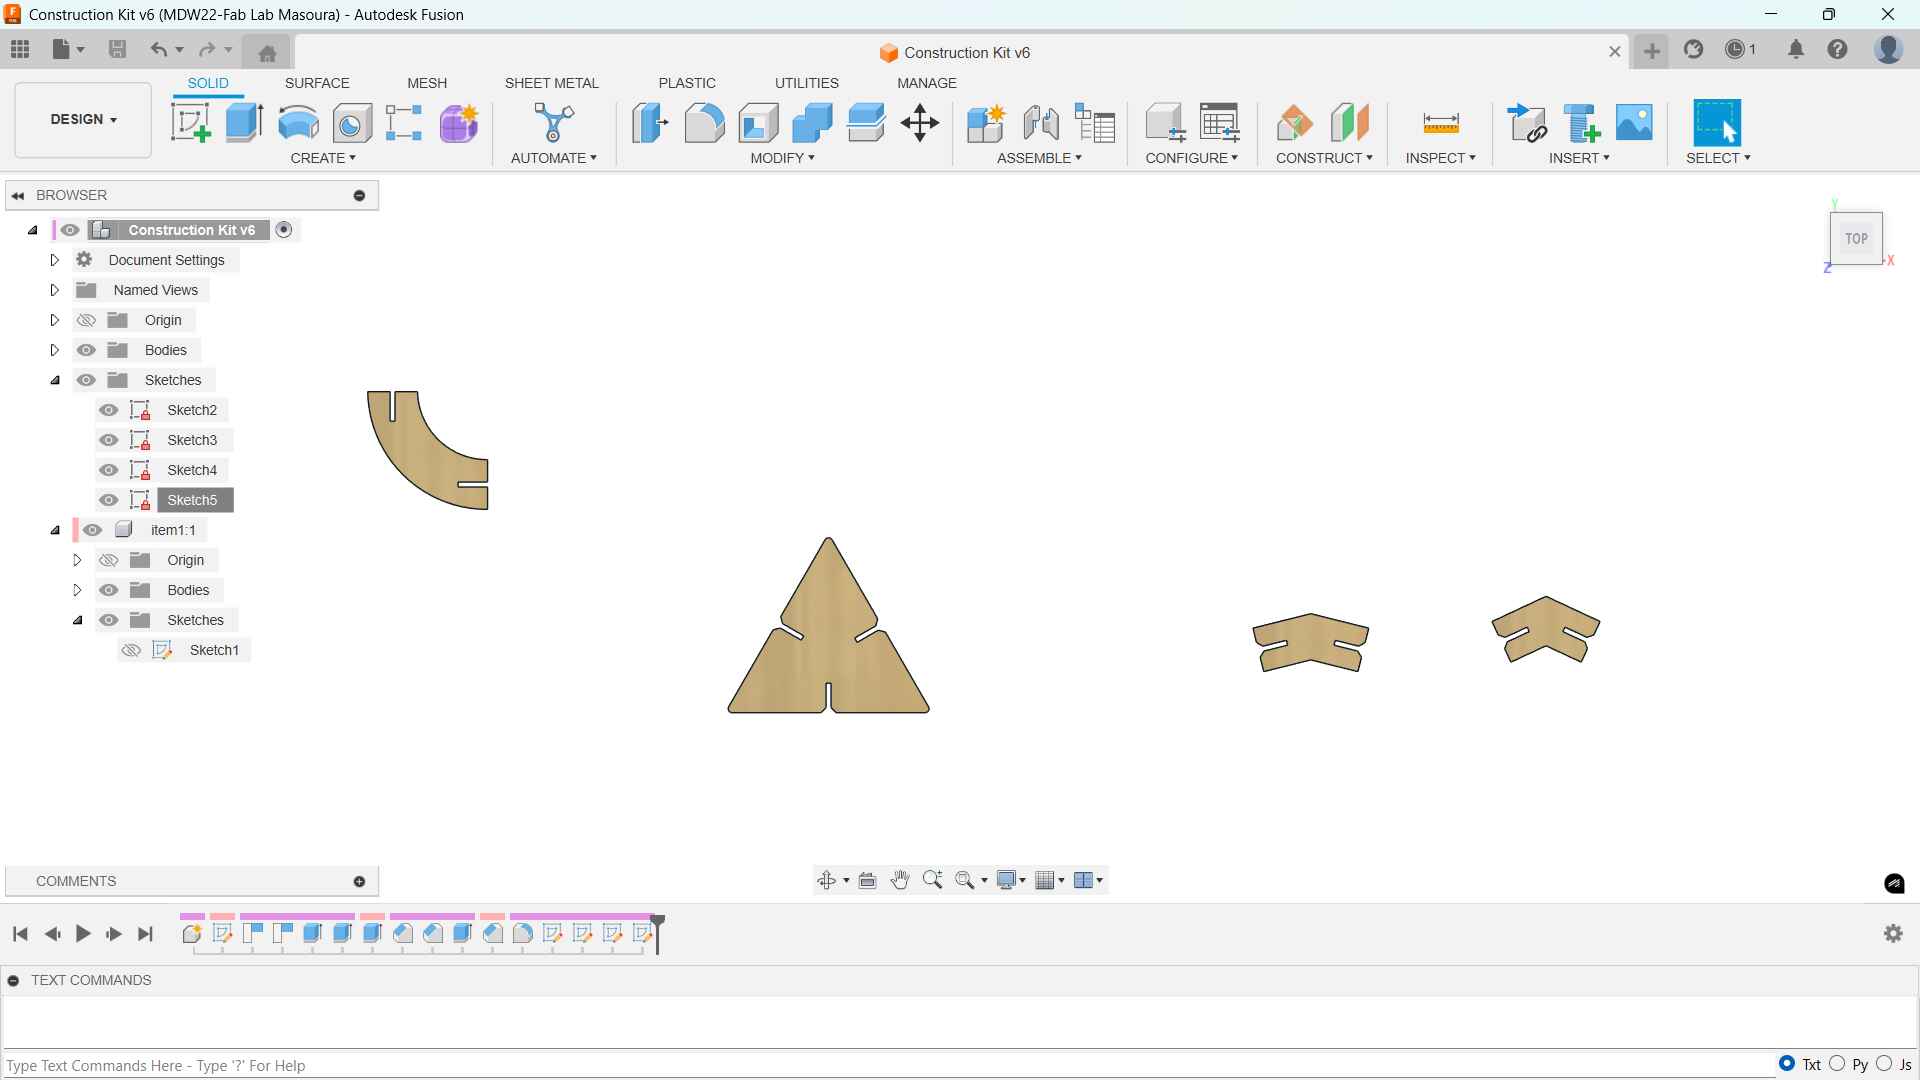
I was inspired by multiple sources to attempt and make a geodesic-type construction kit. I used the pinterest to find ispiration such as this geodesic dome.Also, Julia's Ebert's guide inspired me to play with the angels of the connectors. My idea is to make triangle with some chamfered finger joints and 3 connecters with different angels.
Parametric Models in Fusion & OpensCAD
To help me practice parametric design, we as a group made a parametric laptop holder following this tutorial .
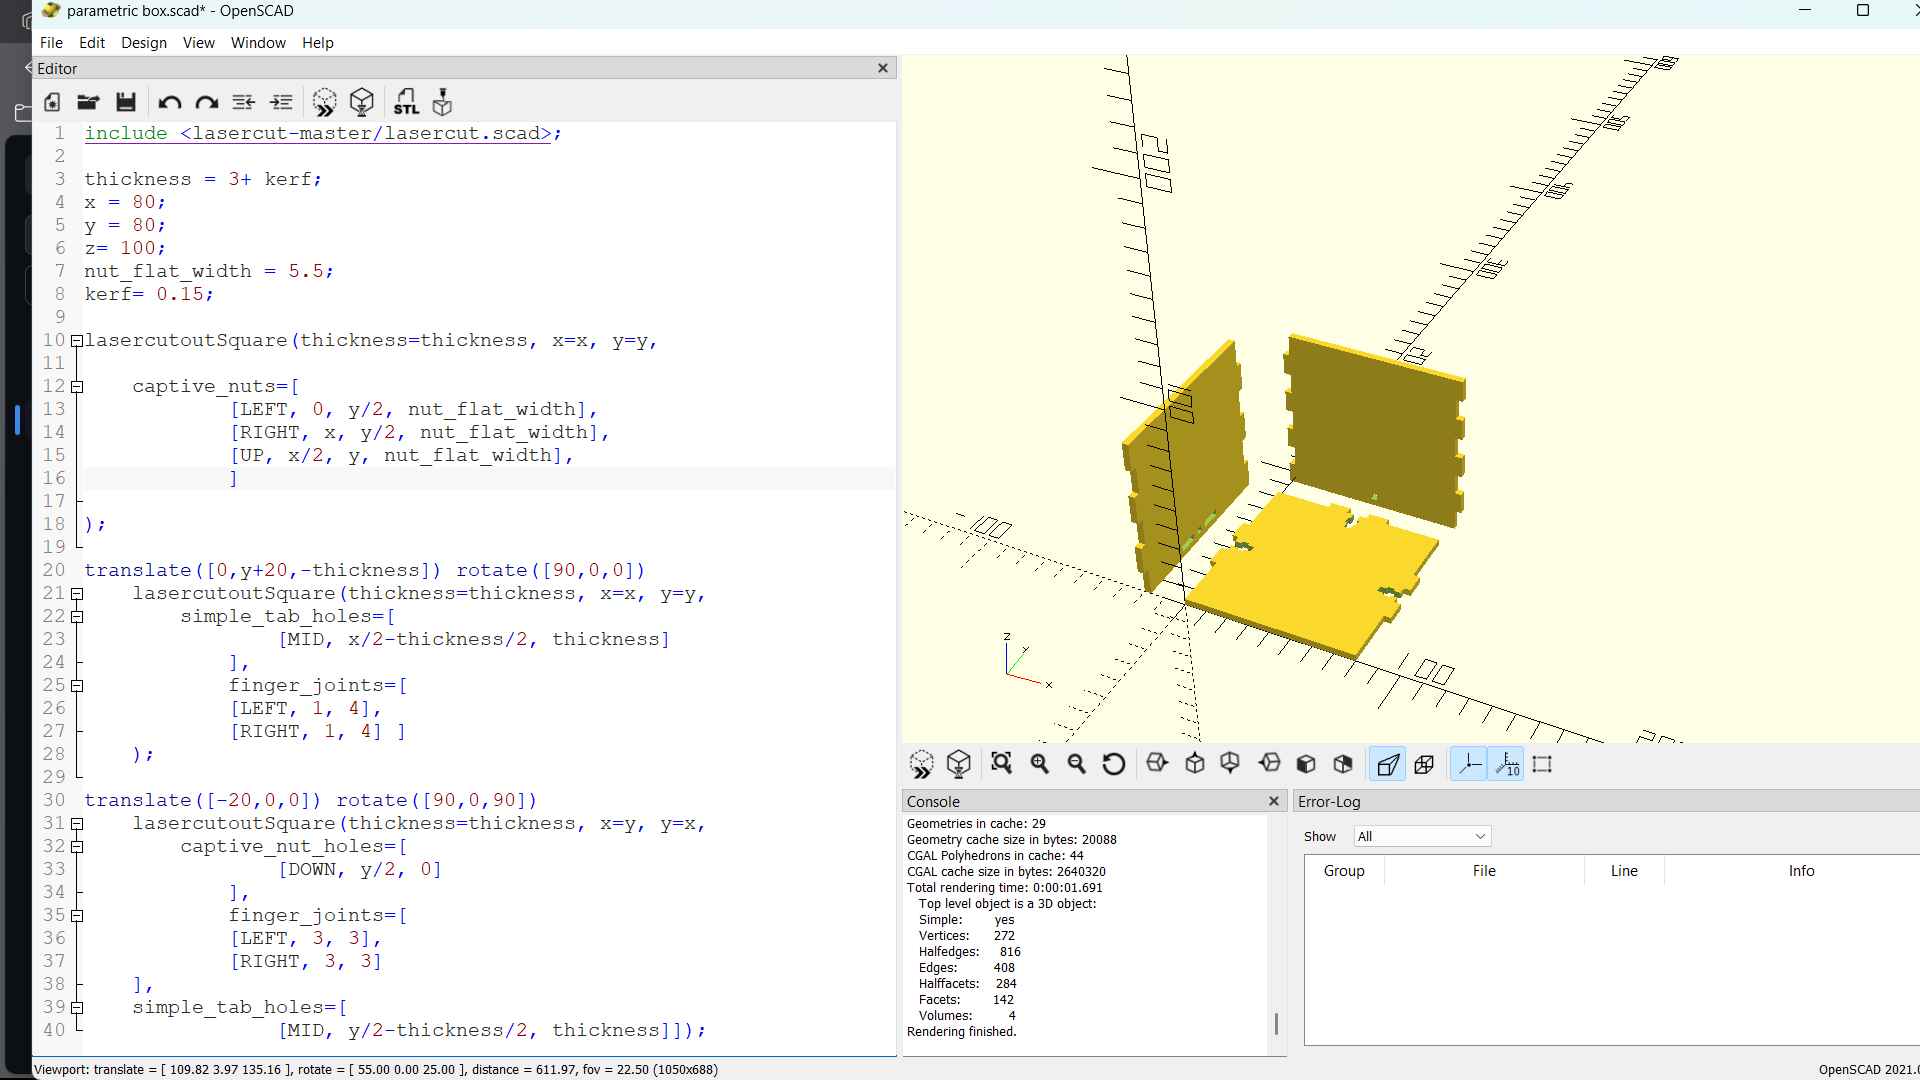
And I used OpenSAD as well to make the parametric model of a box. I played a little bit with this OpensCAD Library
Design in Fusion
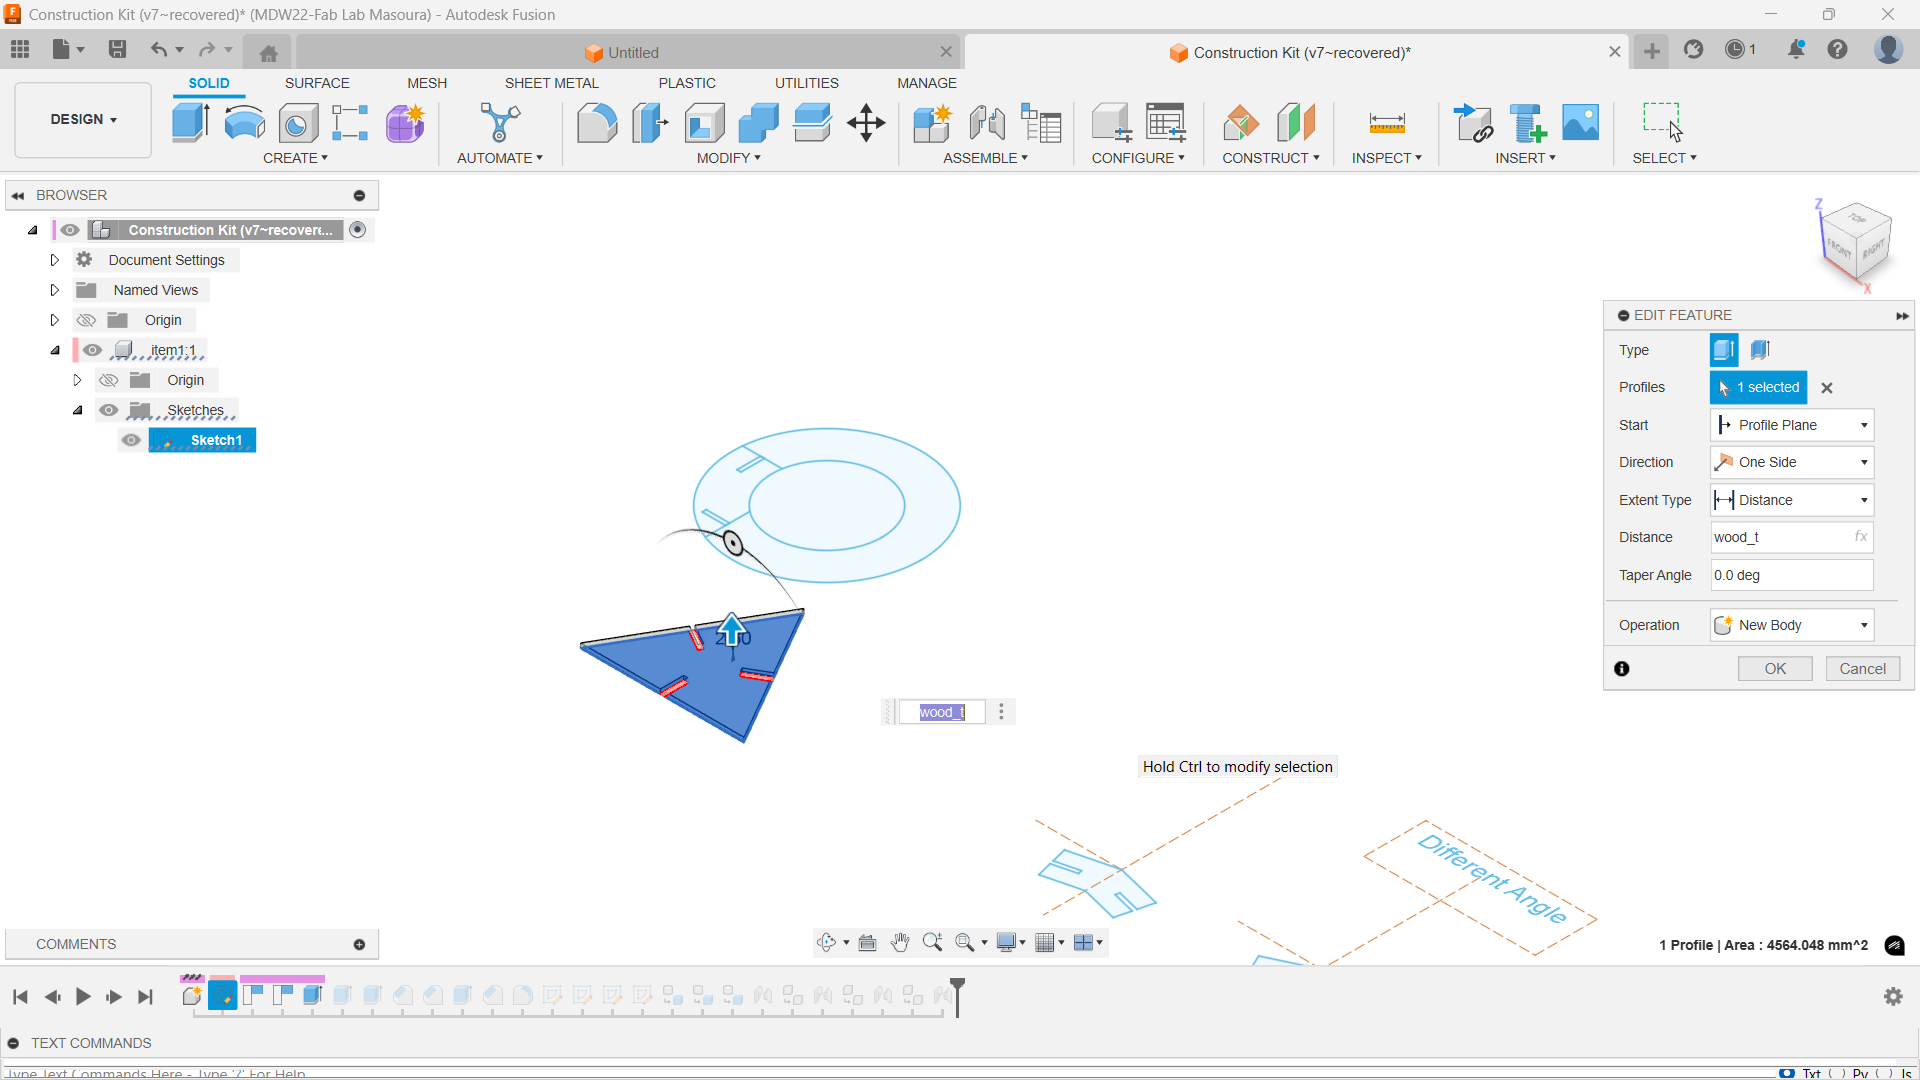
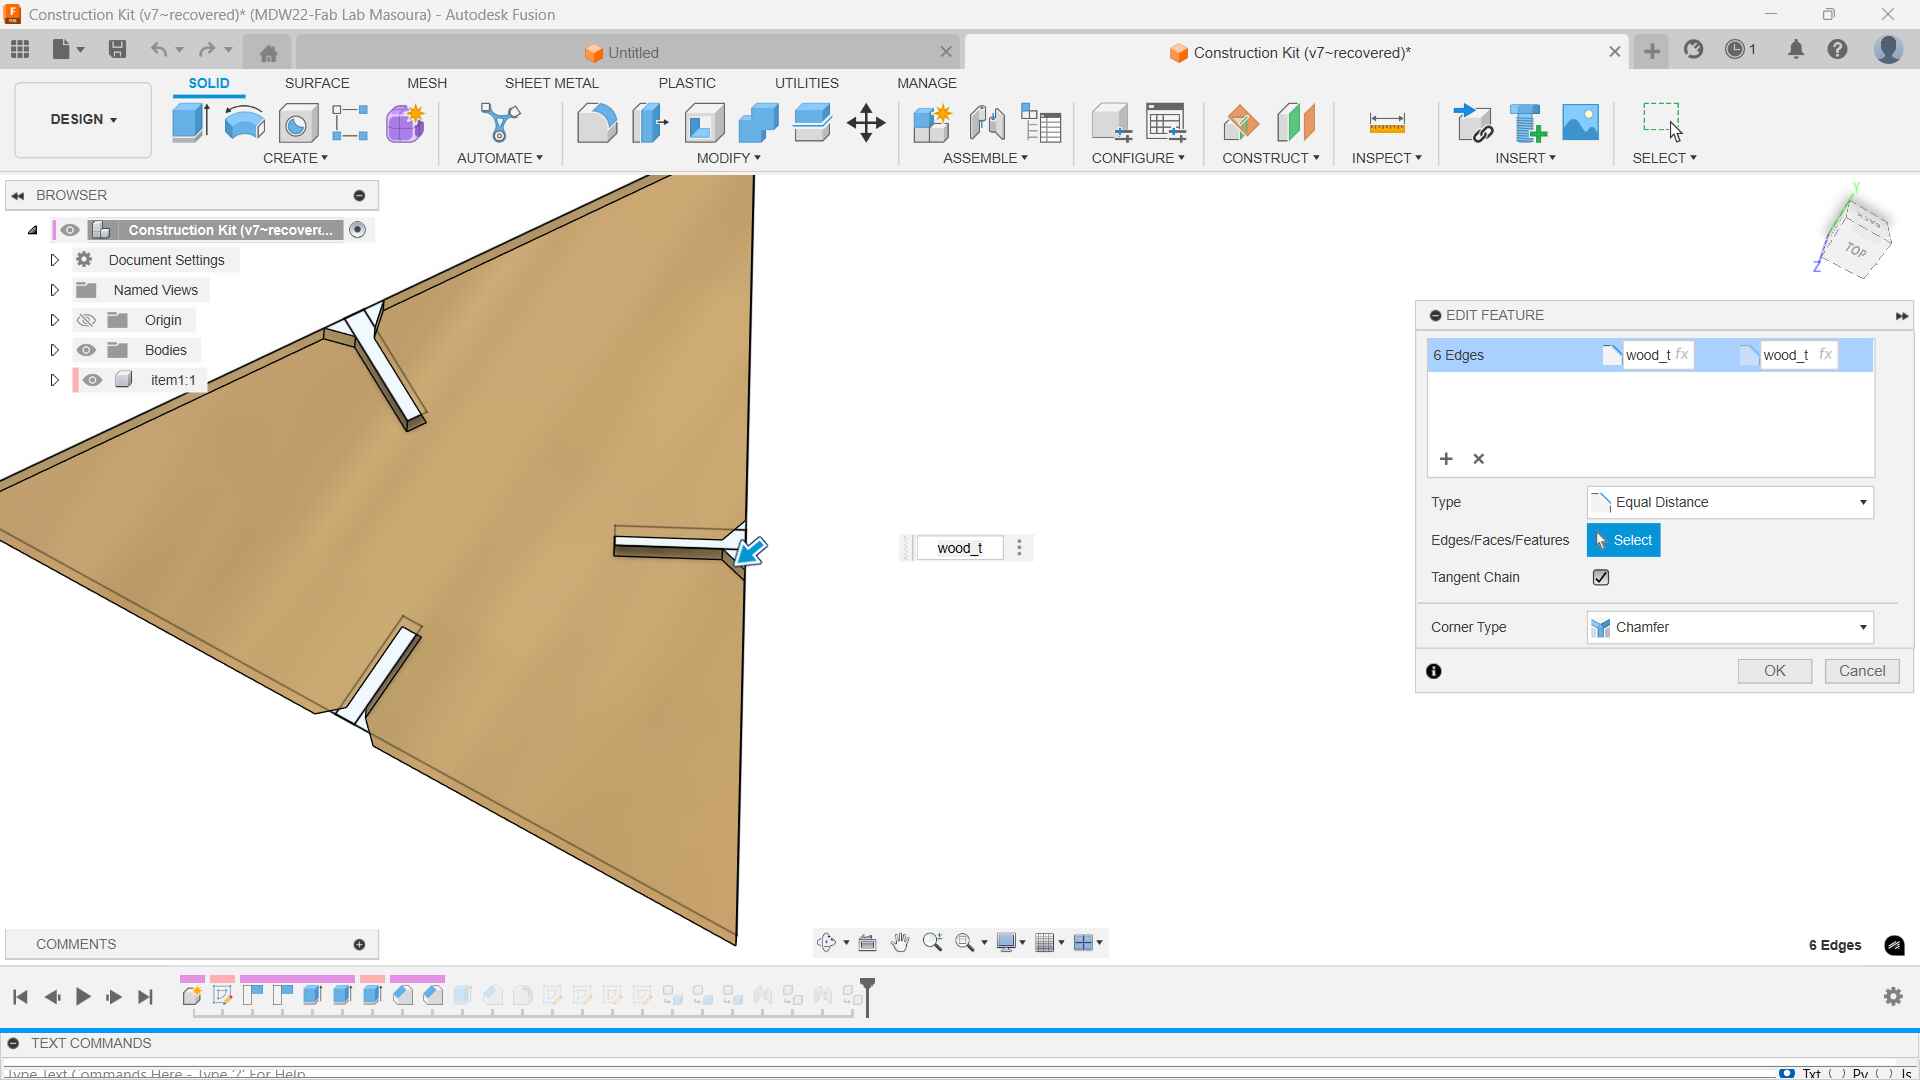
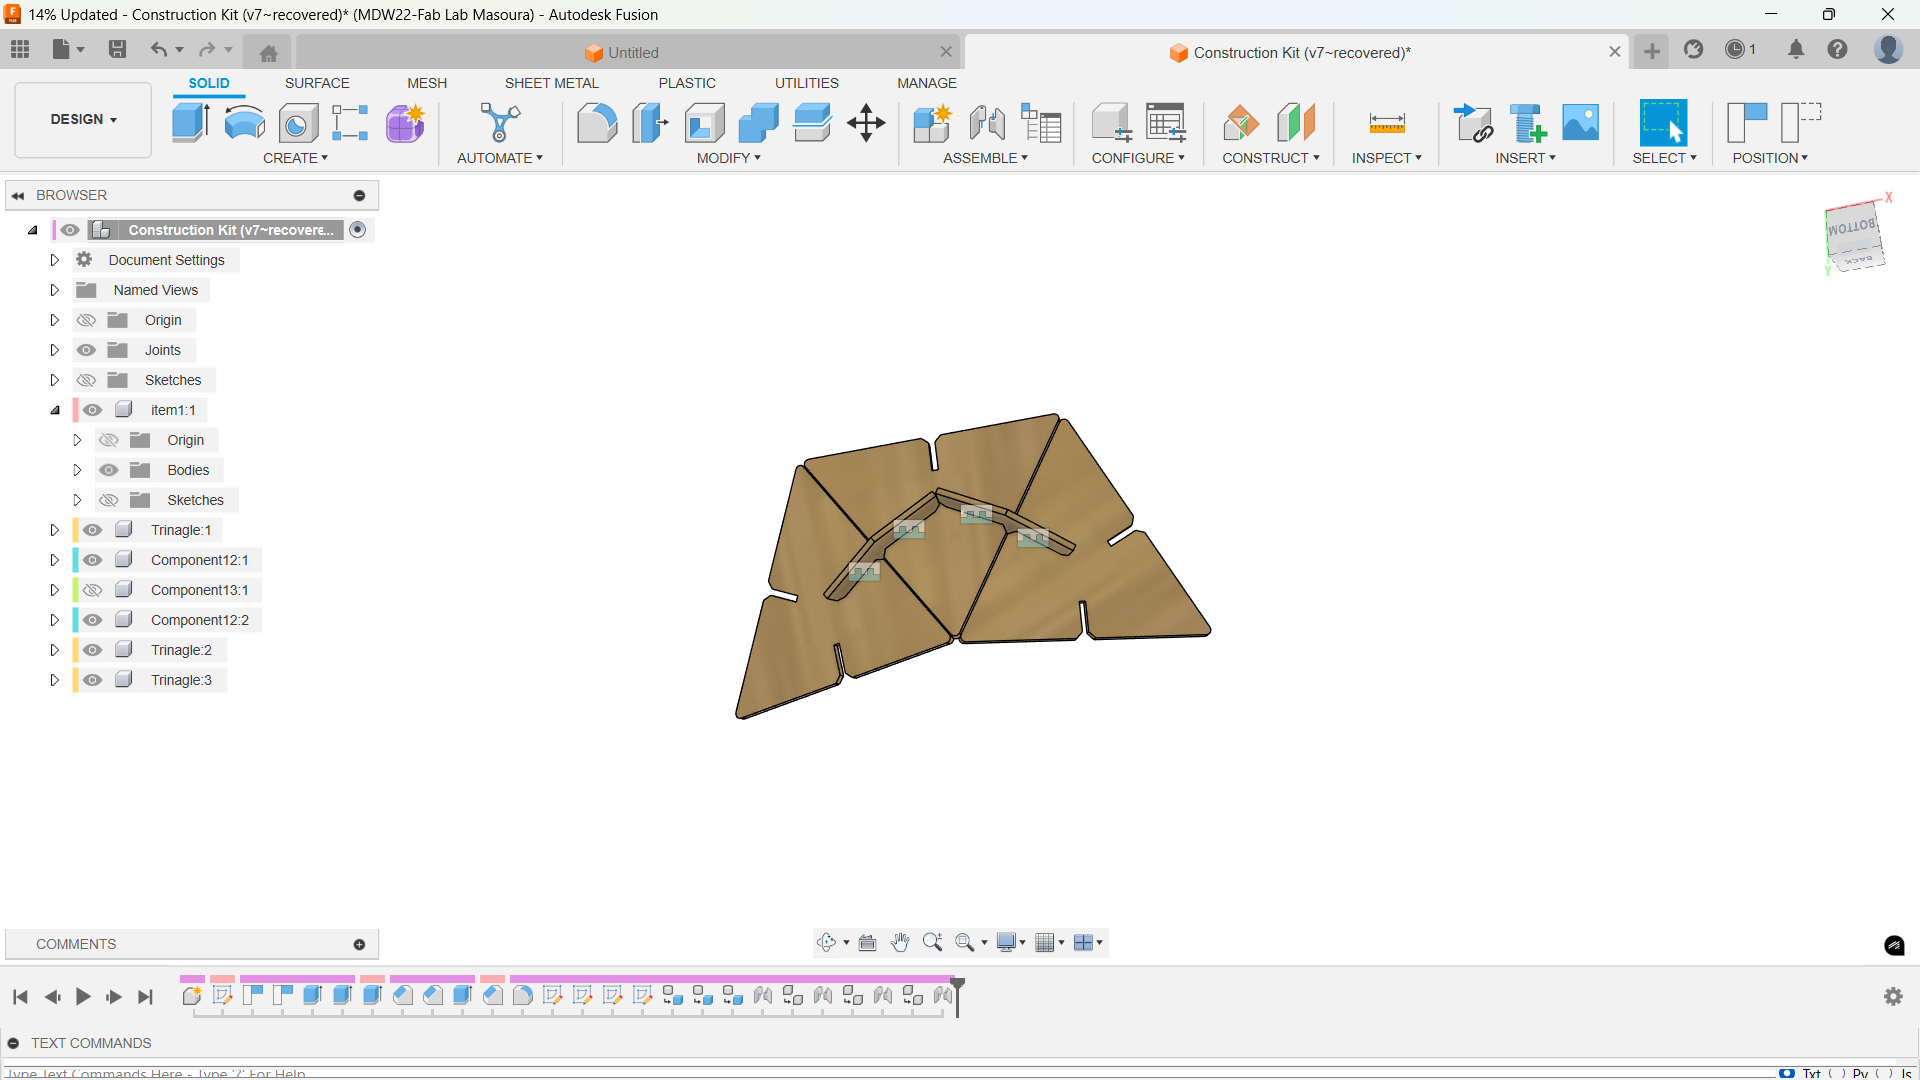
I used Fusion 360 to design the kit. I wanted to experiment with how different angles produced different results. So my kit has 3 connectors and one main object which is the triangle.
- First started with making the parameters that'll be needed like: "Kerf, wood thickness, the size of the triangle, and finger"
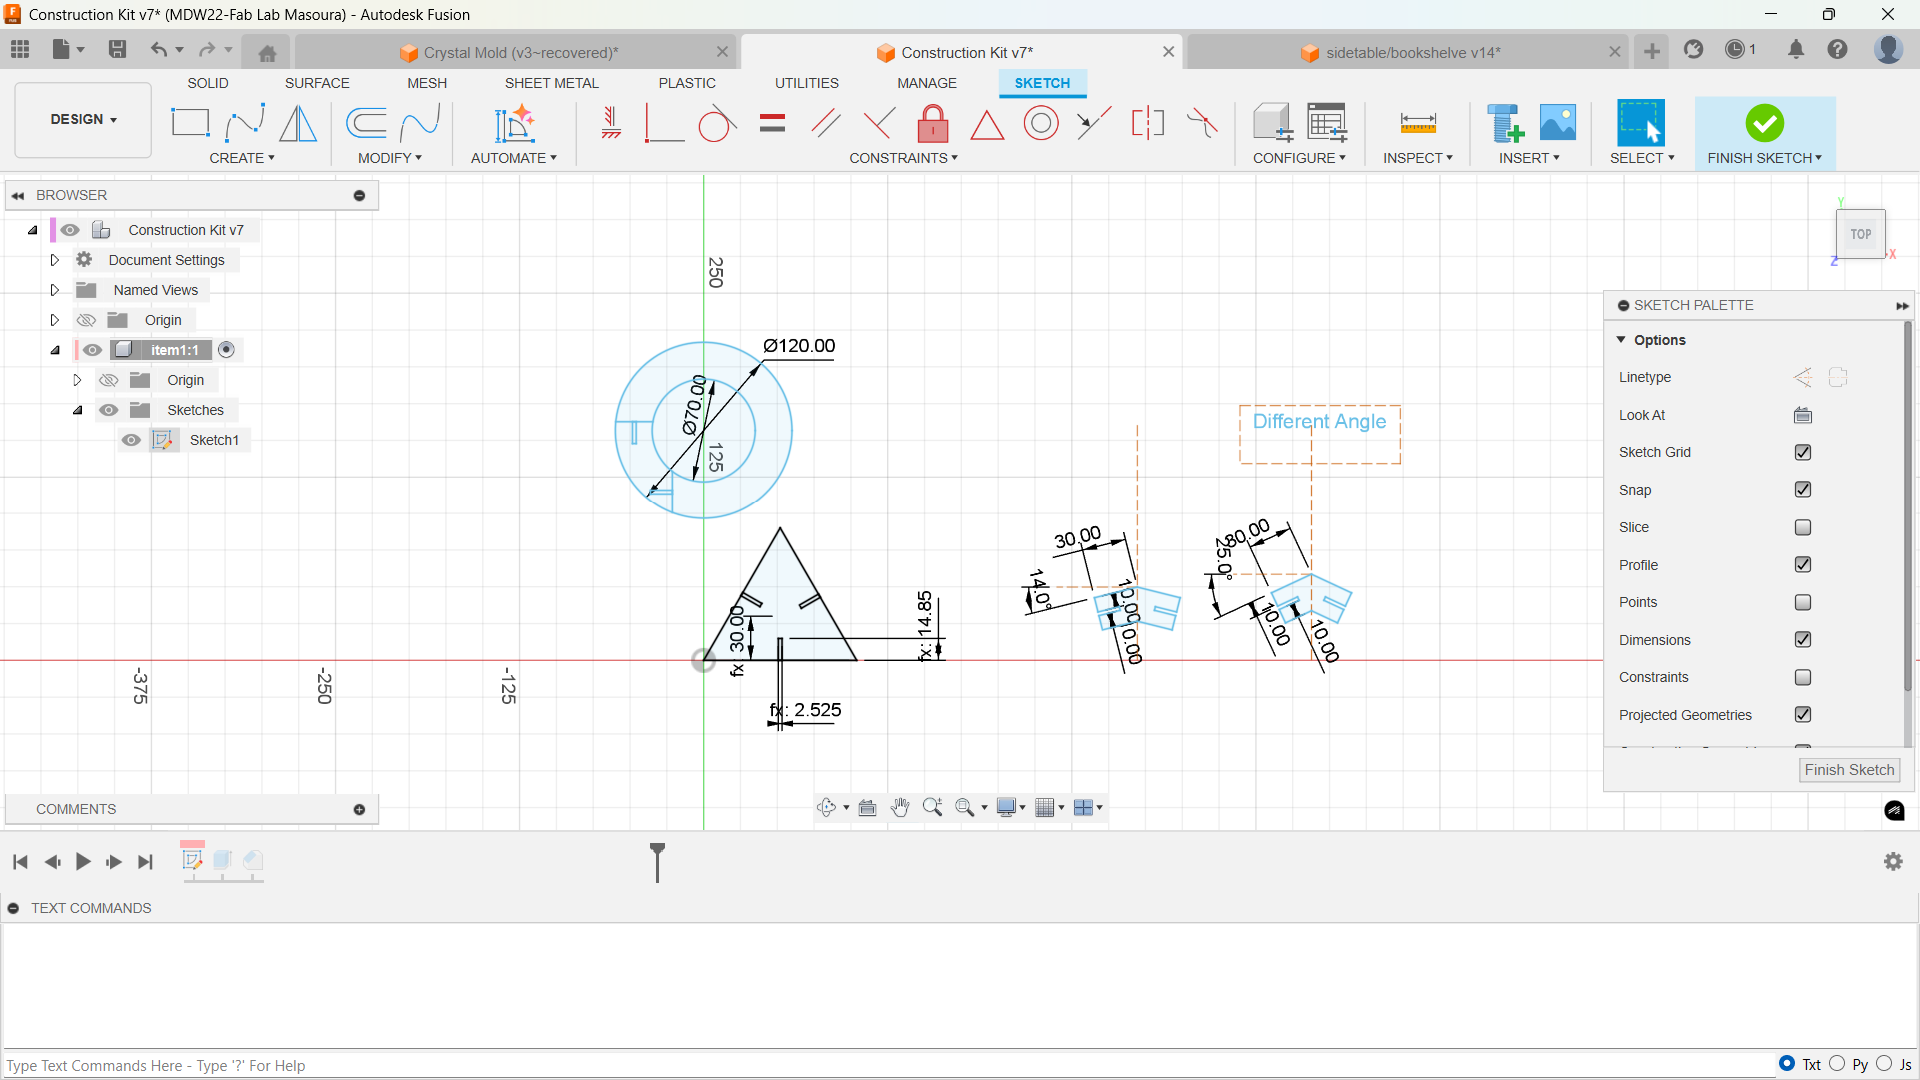
- Then I started sketching the objects
- I extruded the parts using the wood thickness as a paramet
- I added the chamfers to ensure smooth fittings
- Finally I made a small assembly
Nesting & Cutting
I Exported the files as DXF from fusion and imported them to our software. ML149 operates using LaserWork CAM software. So I just downloaded the file and hit the start button

Showcasing
Vinyl Cutting
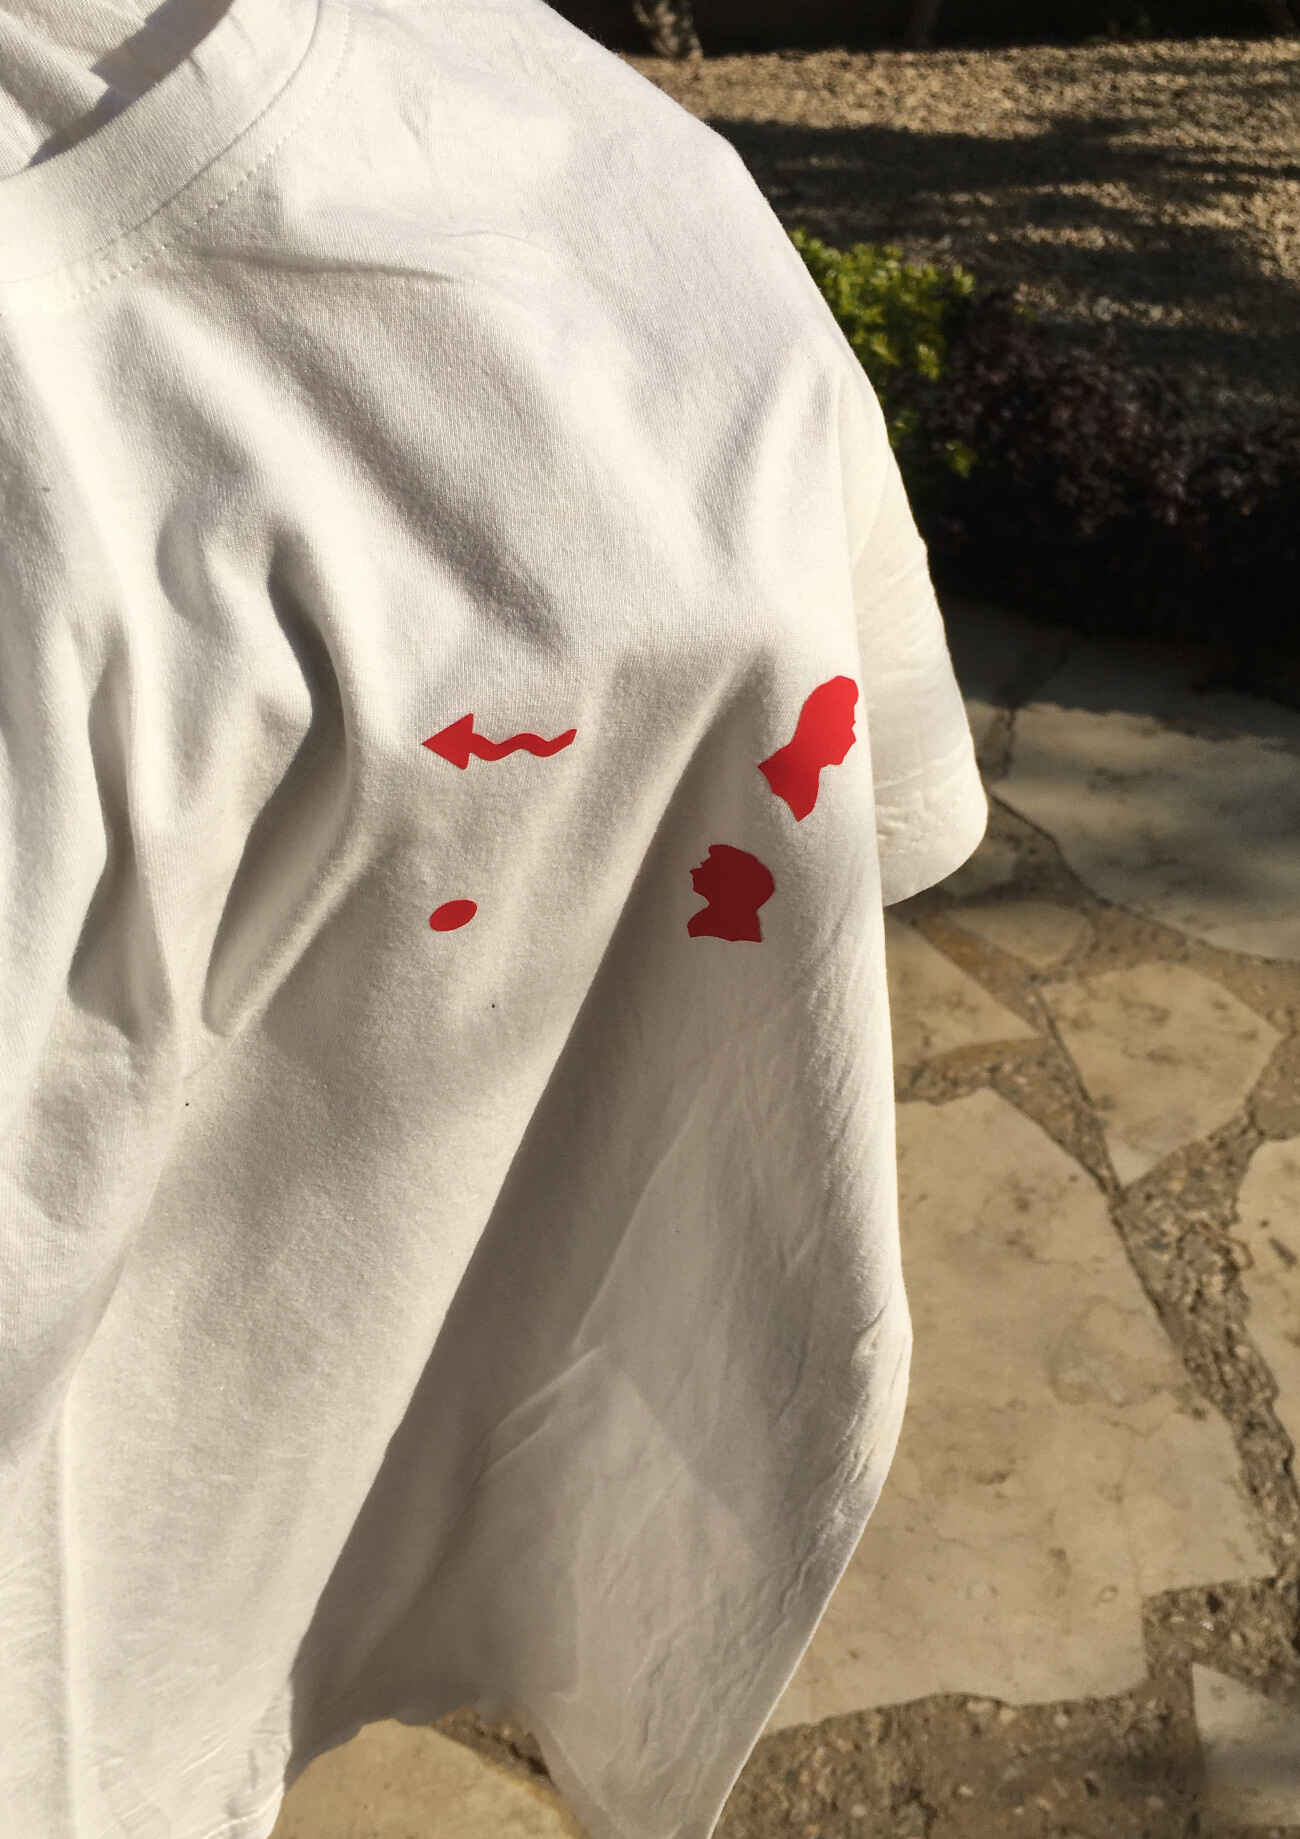
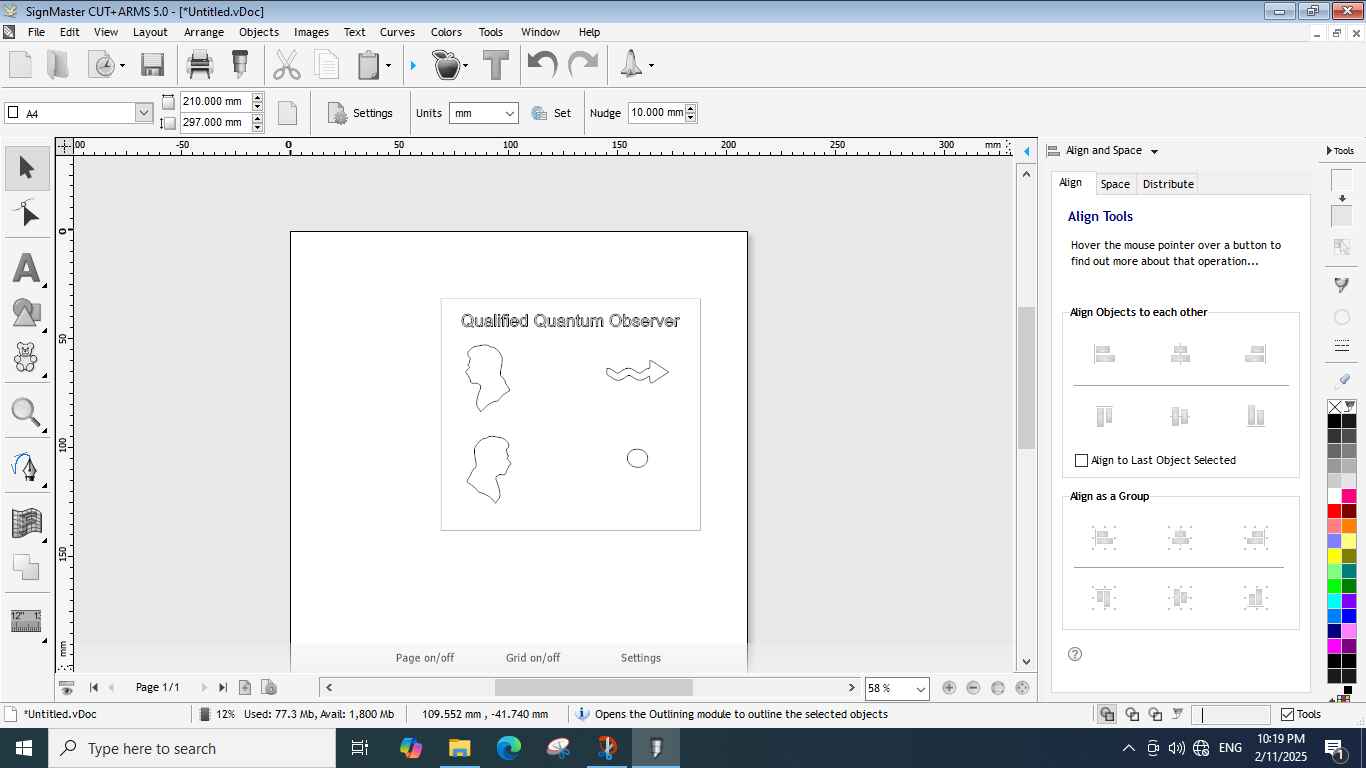
I used the vinyl cutter to cut a quantum mechanics meme inspired by this T-shirt I saw on PBS Spacetime merch I have deep passion for quantum mechanics and I thought it would be a fun idea to make a meme out of it!

I don't want to make it a sticker rather I want it to be heatpressed on a t-shirt, so I used a heat transfer vinyl.
I began by loading the vinyl in the Cutter and making sure the blade is in the right position.

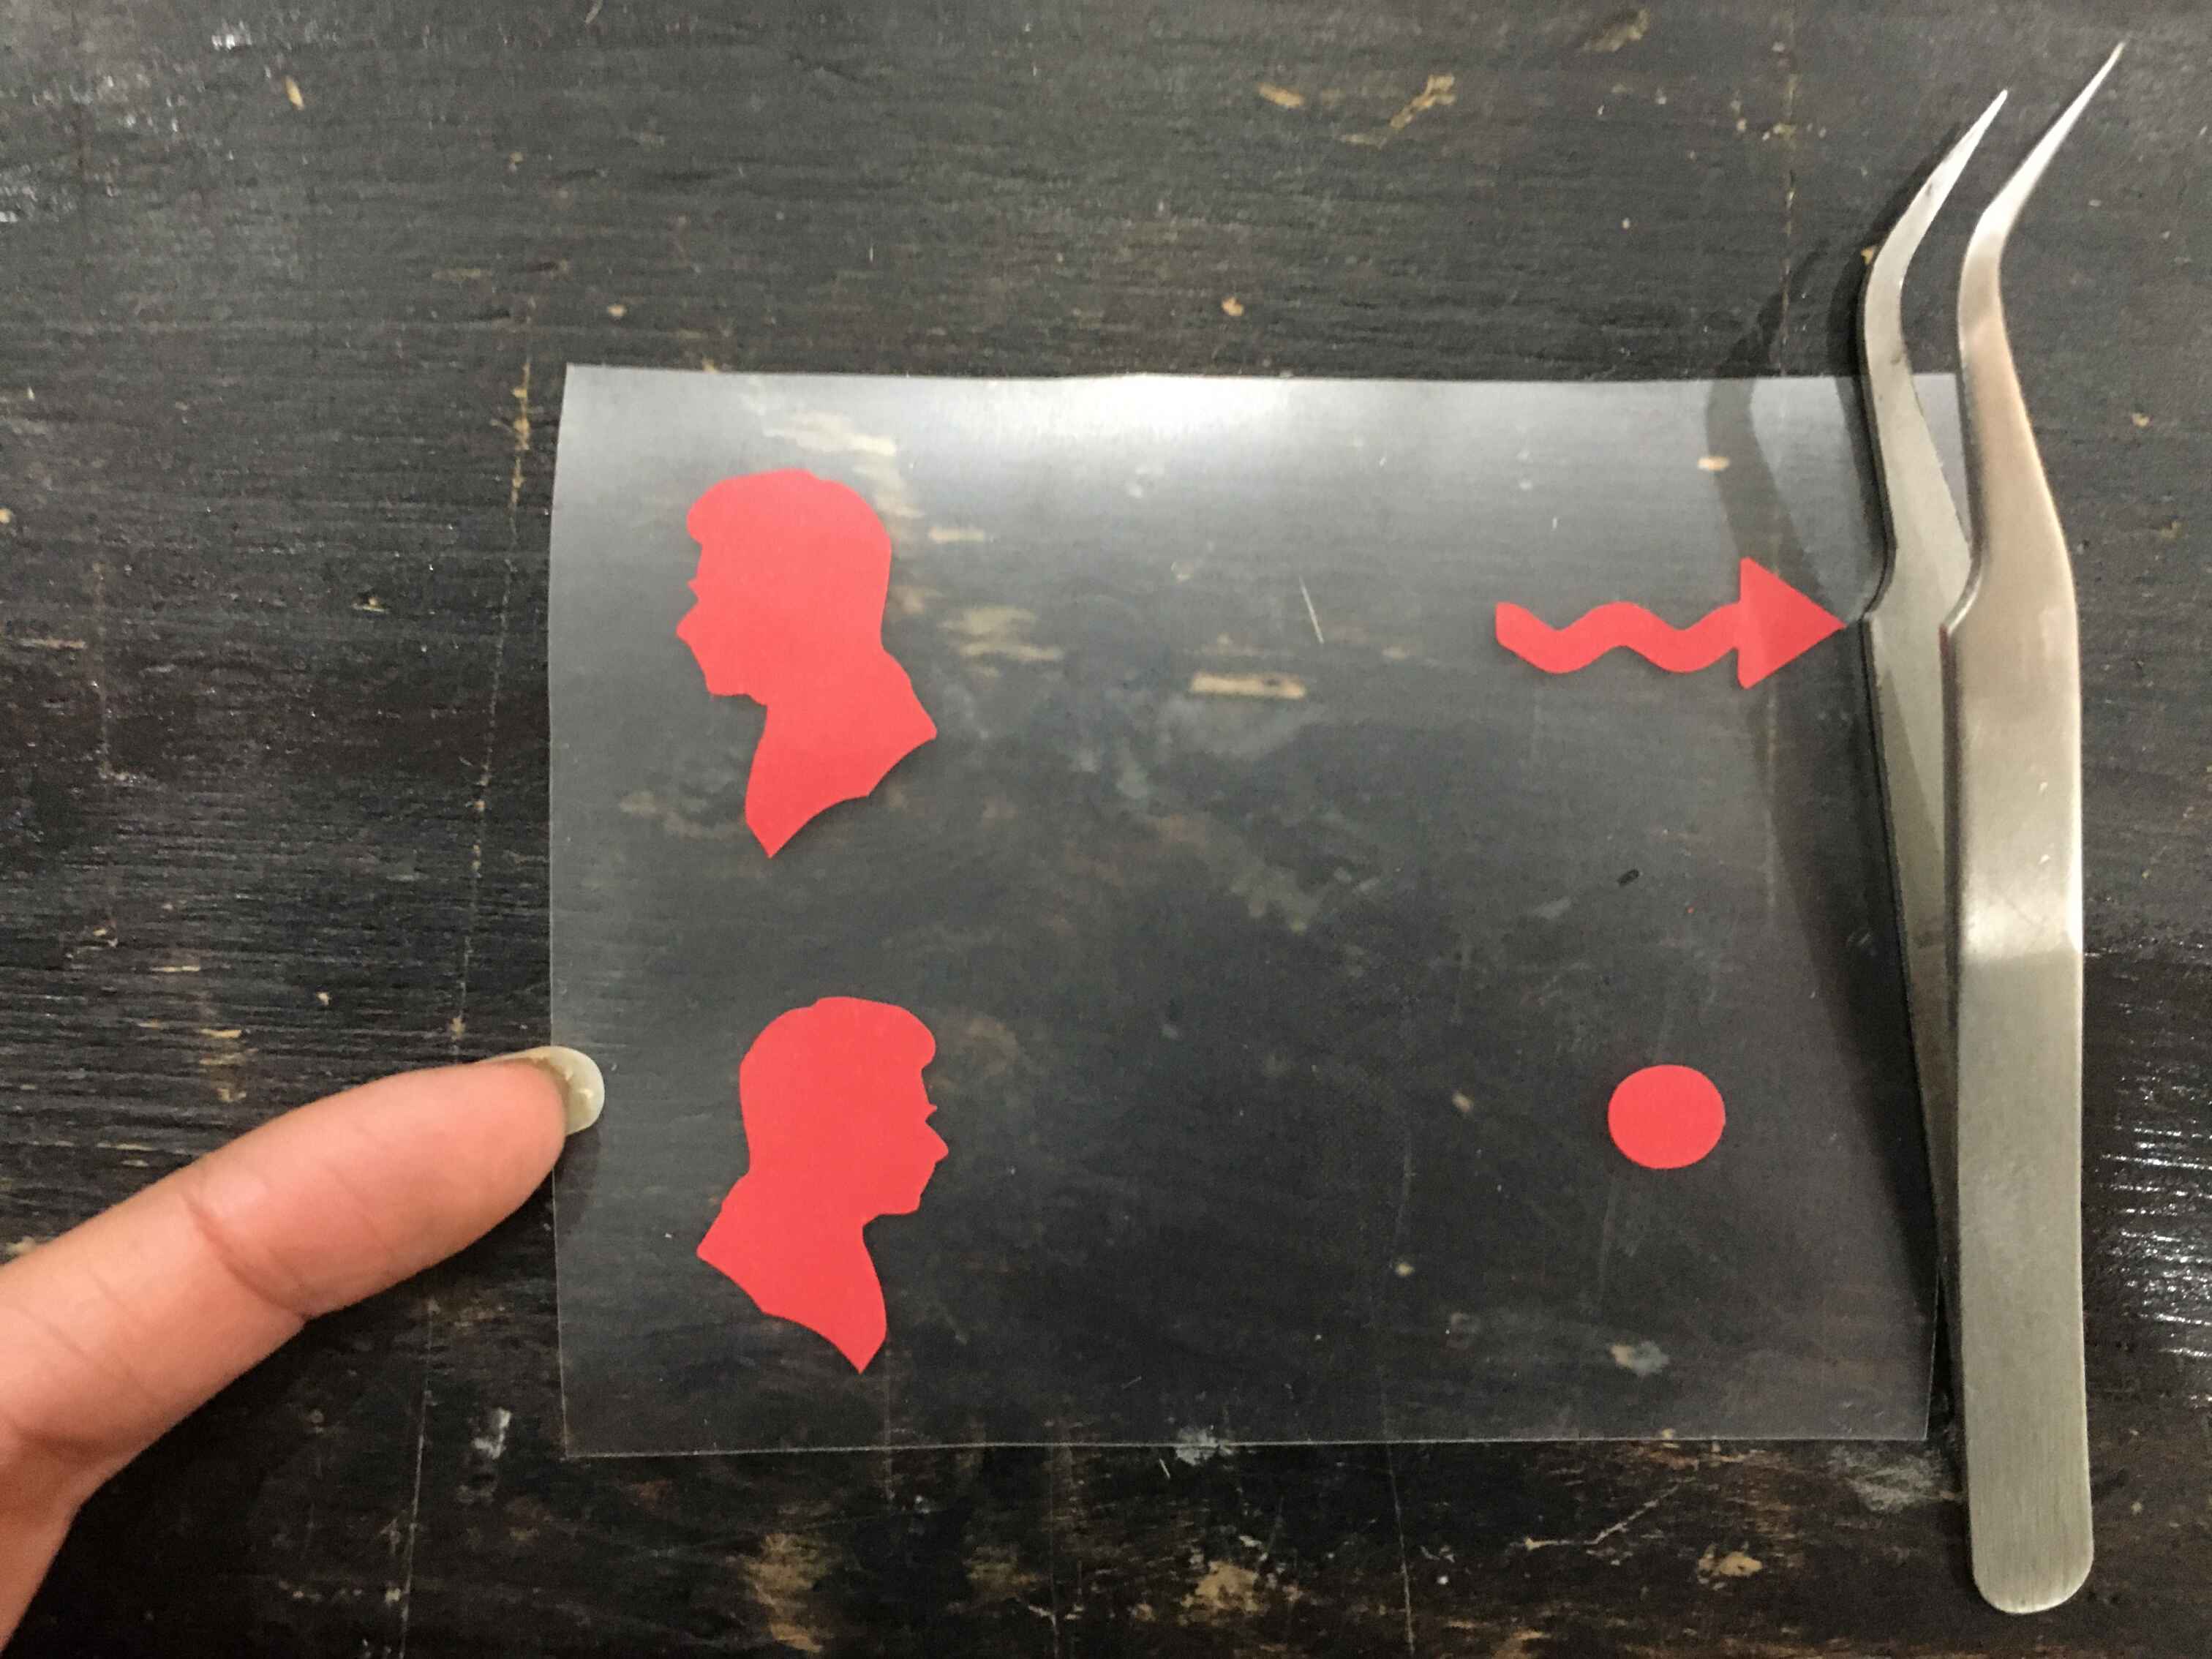
Then I imported the image to SignMaster. I used the trace tool to convert the image to a vector. Added a rectangle around the image to make it easier to weed. Then I hit the cut button and waited for the magic to happen!
I used the weeding tool to remove the excess vinyl.
T-shirt using the heat press machine. I used Temperature:120 degrees, Time: 17 seconds.
.jpg )